
How to Set Up a PetSafe Wireless Fence?
Pet owners face a constant challenge: keeping their furry friends safe while giving them freedom to roam. Traditional fencing can be expensive, require permits, and sometimes clash with neighborhood aesthetics. A PetSafe wireless fence offers an innovative solution that creates invisible boundaries without physical barriers.
This comprehensive guide walks you through every step of setting up your PetSafe wireless fence system. You’ll learn how to install the transmitter, train your pet, and troubleshoot common issues. By the end, you’ll have a fully functional containment system that keeps your pet safe and happy.
What Makes PetSafe Wireless Fences Different
Wireless dog fences work by creating a circular boundary around a central transmitter. Your pet wears a special collar that receives signals from this transmitter. When your dog approaches the boundary, the collar delivers a warning beep followed by a static correction if they continue forward.
PetSafe leads the market in wireless containment technology. Their systems cover areas up to 1.5 acres and work with dogs weighing 8 pounds or more. The collar adjusts to different correction levels, making it suitable for various temperaments and training needs.
Unlike underground fence systems, wireless versions require no digging or wire burial. You simply plug in the transmitter and start training. This makes them perfect for renters, temporary housing situations, or areas where digging isn’t practical.
Essential Components of Your PetSafe System
Before starting installation, verify that your package contains all necessary components. Every PetSafe wireless fence kit includes a transmitter unit, at least one receiver collar, boundary flags, a test light tool, and detailed instructions.
The transmitter serves as the heart of your system. This compact device plugs into any standard electrical outlet and broadcasts the containment signal. Most models feature adjustable range controls and status indicators that show when the system operates correctly.
The receiver collar contains the technology that communicates with your transmitter. Built-in contact points deliver corrections, while LED lights and audio signals provide feedback during setup and training. The collar includes a rechargeable battery that typically lasts 2-3 weeks between charges.
Boundary flags help during the initial training phase. These small, colorful markers create visual cues that reinforce where the invisible boundary exists. You’ll place them around the perimeter during training, then gradually remove them as your pet learns the boundaries.
Preparing Your Installation Area
Success with any wireless fence system depends heavily on proper site preparation. Start by surveying your property to identify the ideal transmitter location. The device needs to be centrally positioned within the area you want to contain your pet.
Your transmitter requires a location that’s protected from weather but allows signal transmission in all directions. Indoor installation works best, typically in a basement, garage, or utility room. Avoid placing the unit near large metal objects, electronic devices, or thick walls that might interfere with signal transmission.
Measure the distance from your proposed transmitter location to the furthest point where you want your boundary. PetSafe systems create circular boundaries, so the coverage area extends equally in all directions from the transmitter. If your property has an irregular shape, you may need to adjust the transmitter position or boundary size.
Clear any temporary obstacles from the boundary area during setup. Remove garden hoses, outdoor furniture, or other items that might confuse your pet during training. You want clean sight lines and easy movement around the entire perimeter.
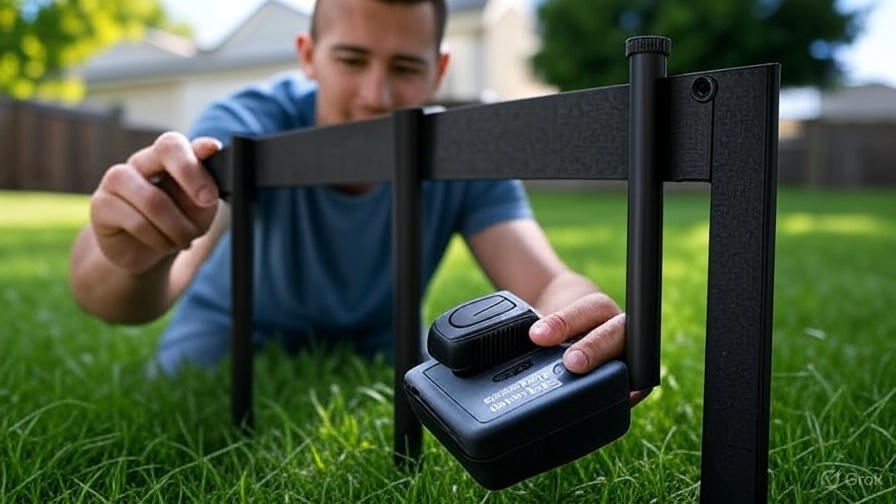
Step-by-Step Transmitter Installation
Begin by connecting your transmitter to a reliable power source. Choose an outlet that won’t be accidentally unplugged and consider using a surge protector to safeguard the electronics. The transmitter should remain powered continuously for the system to function properly.
Position the transmitter at least three feet away from large metal objects like appliances, metal shelving, or HVAC equipment. These items can create signal interference that results in irregular boundary shapes or dead zones where the collar doesn’t receive proper signals.
Turn on the transmitter and allow it to complete its startup sequence. Most PetSafe models have indicator lights that show power status and signal transmission. A solid green light typically indicates normal operation, while flashing or red lights suggest problems that need attention.
Test the transmitter’s range using the included test light tool. This handheld device beeps and lights up when it receives the containment signal. Walk away from the transmitter in different directions, noting where the test light activates. This helps you understand your boundary’s actual shape and size.
Adjust the boundary range using the transmitter’s control dial. Start with a smaller setting and gradually increase it until you achieve the desired coverage area. Remember that factors like terrain, weather, and nearby metal objects can affect the actual boundary shape.
Setting Up the Receiver Collar
Before placing the collar on your pet, you need to configure it properly. Start by fully charging the collar battery according to the manufacturer’s instructions. A low battery can cause inconsistent corrections and unreliable boundary detection.
Check the collar’s fit carefully. The contact points must touch your pet’s skin to deliver corrections effectively. Part the fur and ensure the metal contacts rest against the skin. The collar should be snug but not tight – you should be able to slide one finger between the collar and your pet’s neck.
Test the collar’s correction levels using your hands. Most PetSafe collars have multiple correction settings, from mild to more intense. Start with the lowest setting that gets your pet’s attention. You can always increase the level later if needed during training.
Verify that the collar receives signals properly throughout your boundary area. Walk around the perimeter with the collar in your hand, listening for the warning beeps that indicate the boundary zone. The collar should beep consistently when you approach the boundary from any direction.
Boundary Flag Placement Strategy
Proper flag placement creates visual landmarks that help your pet understand where the invisible boundary exists. Space the flags approximately 8-10 feet apart around the entire perimeter. This close spacing ensures your pet can always see at least one flag during training sessions.
Place each flag at the exact point where the collar begins its warning beep. Use the test light tool or the collar itself to identify these precise locations. Consistency in flag placement reinforces the boundary location and speeds up the training process.
Consider your landscape when positioning flags. Place them in areas where they’ll remain visible and stable. Avoid locations where sprinklers might knock them over or where they’ll be hidden by vegetation. The flags need to serve as clear, consistent markers throughout the training period.
Number your flags or use different colors to help track your progress during training. This organization helps you systematically work around the boundary and ensures you don’t miss any sections during training sessions.
Training Your Pet: Week One Foundation
Training success determines whether your wireless fence becomes an effective containment tool or an expensive disappointment. Plan to spend 2-3 weeks on training, with daily sessions lasting 15-20 minutes. Consistency and patience during this period pay huge dividends in long-term success.
Start training with the collar set to beep-only mode. This allows your pet to learn the boundary location without experiencing corrections. Walk your pet on a leash around the perimeter, stopping when you hear the warning beep. Immediately guide your pet away from the boundary and offer praise and treats.
Create positive associations with staying within the boundary. Spend most of your training time playing games, giving treats, and providing attention in the safe zone. Your pet should learn that good things happen when they stay away from the flags and boundary area.
Practice the “retreat” command during every session. When the collar beeps, say “retreat” or “back” and guide your pet toward the center of the safe area. Reward this behavior immediately with treats and praise. This command becomes crucial for preventing boundary crossings.
Gradually increase training sessions as your pet shows understanding. Some dogs learn quickly, while others need more repetition. Watch for signs that your pet recognizes the boundary: hesitation near flags, turning away from the beep, or automatically retreating when they hear the warning.
Advanced Training Techniques
After your pet consistently responds to the warning beep, introduce static corrections at the lowest effective level. This typically happens during the second week of training. The correction should surprise your pet, not frighten or hurt them.
Practice controlled boundary approaches during this phase. Allow your pet to hear the warning beep, and if they don’t retreat on their own, let them experience the correction. Immediately call them back to the safe zone and reward their return with enthusiasm and treats.
Introduce distractions gradually to test your pet’s commitment to the boundary. Start with mild distractions like toys or treats near the boundary. Progress to more challenging scenarios like other animals, people walking by, or exciting activities outside the boundary.
Vary your training locations around the entire perimeter. Don’t focus on just one section of the boundary. Your pet needs to understand that the restriction applies everywhere, not just at specific locations. This comprehensive approach prevents the development of weak spots in their training.
Test your pet’s response when you’re not present. Set up situations where you can observe from a distance without your pet knowing you’re watching. This reveals whether they respect the boundary when they think no supervision exists.
Troubleshooting Common Installation Issues
Signal interference represents the most frequent problem with wireless fence systems. If your boundary appears irregular or has dead zones, check for metal objects, underground utilities, or electronic devices near your transmitter. Relocating the transmitter even a few feet can resolve these issues.
Collar fit problems cause many training difficulties. If your pet seems unresponsive to corrections, verify that the contact points touch their skin properly. Long-haired breeds may need the hair trimmed around the contact area for effective signal transmission.
Battery issues can create inconsistent system performance. Replace or recharge collar batteries according to the manufacturer’s schedule, even if they seem to be working. Weak batteries cause erratic behavior that confuses pets and undermines training progress.
Weather conditions sometimes affect system performance. Heavy rain, snow, or extreme temperatures can impact signal transmission or collar function. Most PetSafe systems are weather-resistant but may need protection during severe conditions.
Boundary drift occurs when the containment area gradually shifts over time. This usually results from power fluctuations or electronic interference. Regularly test your boundary with the test light tool to ensure it remains consistent and properly positioned.
Maintaining Your Wireless Fence System
Regular maintenance keeps your PetSafe system functioning reliably for years. Check the collar fit monthly, as weight changes or fur growth can affect proper contact with the skin. Clean the contact points weekly to remove dirt, oils, or corrosion that might interfere with signal transmission.
Monitor battery performance closely. Most collars provide low-battery warnings, but don’t wait until the battery dies completely. Keep spare batteries or maintain a charging schedule to ensure continuous protection for your pet.
Test the entire system monthly using the test light tool. Walk the perimeter to verify that the boundary remains consistent and covers the intended area. Document any changes in boundary size or shape that might indicate developing problems.
Inspect boundary flags regularly and replace any that become damaged or faded. While you’ll eventually remove most flags after training completion, keep a few in place as permanent visual reminders for your pet.
Update your system’s software or firmware when manufacturers release improvements. Many newer PetSafe models allow updates that enhance performance, add features, or fix known issues.
Safety Considerations and Best Practices
Never leave your pet unattended with the wireless fence system until training is completely solid. Even well-trained pets can become confused or panicked in unusual situations. Build up to longer unsupervised periods gradually over several weeks.
Remove the collar during storms, extremely hot weather, or when your pet seems stressed or unwell. The electronic components can malfunction in severe weather, and stressed pets may not respond predictably to corrections.
Provide adequate shelter, water, and shade within the containment area. Your pet needs access to comfort and safety resources without having to cross the boundary. Plan your boundary size to include these essential areas.
Consider backup containment methods for high-value situations. If delivery trucks, maintenance workers, or emergency vehicles need access to your property, have a plan that doesn’t rely solely on the wireless fence system.
Monitor your pet’s behavior for signs of stress or anxiety related to the containment system. Some sensitive animals may develop fear responses that extend beyond the boundary area. Professional training help may be necessary if these issues develop.
Maximizing Long-Term Success
Consistency in daily routines helps maintain your pet’s respect for the boundary system. Don’t allow boundary crossings “just this once” for any reason. Every exception undermines the training and can lead to system failure when you need it most.
Continue periodic training refreshers even after your pet seems fully trained. Practice retreat commands and boundary respect exercises monthly to keep the training fresh in your pet’s mind.
Gradually reduce your supervision and flag usage as your pet demonstrates reliable boundary respect. This transition should happen slowly over several weeks, removing only a few flags at a time and extending unsupervised periods gradually.
Plan for system expansion if your needs change. Many PetSafe systems allow additional collars for multiple pets or transmitter upgrades for larger coverage areas. Understanding these options helps you adapt the system as your situation evolves.
Document your training progress and system settings. Keep records of what works best for your pet, including collar settings, training techniques, and any special considerations. This information proves valuable if you need to retrain or help others set up similar systems.
Conclusion
Setting up a PetSafe wireless fence requires careful planning, consistent training, and ongoing maintenance. The time invested in proper installation and training pays off with years of reliable pet containment that gives both you and your pet freedom and peace of mind.
Your success depends on following each step methodically and remaining patient during the training process. Every pet learns at their own pace, and rushing the process often leads to problems that require starting over. Take the time to do it right the first time.
The wireless fence system becomes most effective when integrated into a comprehensive approach to pet safety and training. Use it alongside other training methods, regular exercise, and proper socialization to create a well-behaved, happy pet who respects boundaries naturally.
Remember that the wireless fence serves as a tool, not a replacement for proper pet supervision and care. When used correctly, it enhances your pet’s freedom while maintaining their safety, creating the perfect balance for modern pet ownership.