How to Put Bows in Dogs Hair?
You’ve probably seen adorable photos of dogs wearing cute little bows in their fur. Maybe you’ve wondered how those pet parents get those accessories to stay in place. Or perhaps you want to dress up your own pup for a special occasion or just make them look extra fancy for their daily walk.
The good news is that putting bows in your dog’s hair isn’t as complicated as it might seem. You don’t need professional grooming skills or expensive equipment. With the right supplies and a little practice, you can make your furry friend look absolutely stunning.
Why Dog Hair Bows Are More Than Just Cute
Before we get into the how-to part, let’s talk about why so many dog owners love using bows on their pets. Yes, they look adorable. But there’s more to it than that.
Dog hair bows serve a practical purpose for breeds with long facial hair. Dogs like Shih Tzus, Maltese, and Yorkshire Terriers often have hair that grows long enough to cover their eyes. This hair can irritate their eyes and even affect their vision. Pulling that hair back with a bow keeps it out of their face and prevents eye problems.
The bows also make grooming easier. When you tie up the top knot hair, you can see any tear stains or eye discharge more clearly. This makes it simple to clean around the eye area and keep your dog’s face healthy.
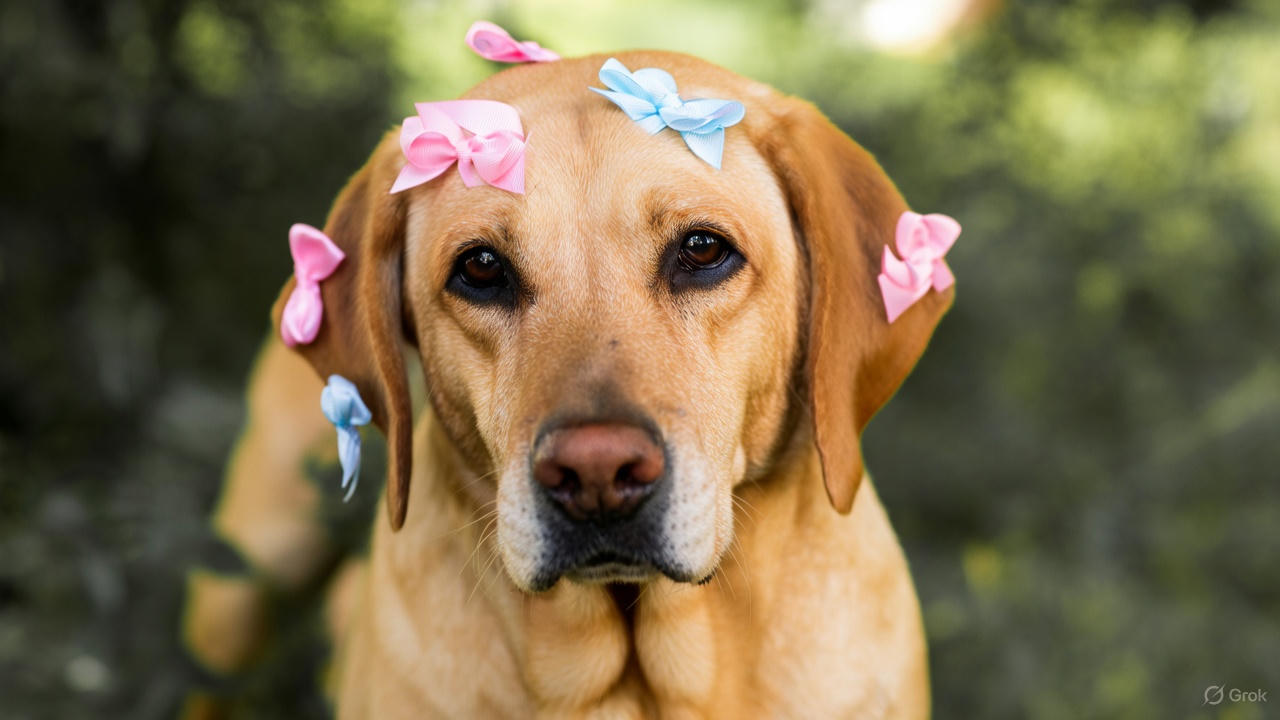
Beyond the practical benefits, bows let you express your dog’s personality. You can match them to outfits, holidays, or seasons. Some pet parents coordinate their dog’s bows with their own accessories. It’s a fun way to bond with your pet and show them off to the world.
Getting Your Dog Ready for Hair Bows
Your dog won’t naturally understand why you want to put things in their hair. Some dogs tolerate it immediately, while others need time to adjust. The key is making the experience positive from the start.
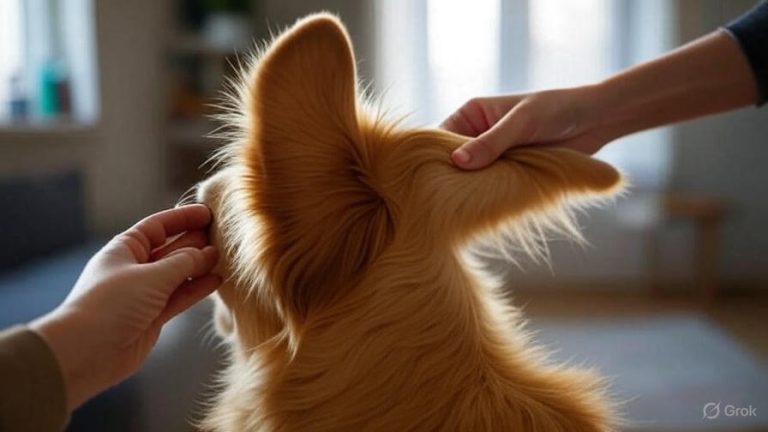
Start by getting your dog comfortable with you touching their head and face. Pet them gently around their ears, forehead, and muzzle. Give them treats while you do this. You want them to associate head touching with good things.
Once your dog seems relaxed with head touches, introduce them to the bow. Let them sniff it. Give them a treat. Do this several times over a few days. Your dog needs to learn that the bow isn’t scary or dangerous.
Practice gathering their hair without actually putting the bow in. Gently pull the hair on top of their head into a small bunch. Hold it for a second, give a treat, and release. Repeat this until your dog stays calm during the process.
Timing matters too. Don’t try to put a bow in when your dog is hyper or excited. Wait for calm moments, like after a walk or play session. A tired dog is much easier to work with than an energetic one.
Essential Supplies You’ll Need
You can’t just grab any old hair tie and expect it to work on your dog. Dogs have different hair textures than humans, and their bows need to be safe for them to wear.
Dog-specific hair bows and bands come first on your shopping list. These are designed not to pull or damage dog hair. Human hair elastics often have metal parts that can tangle in fur or hurt your pet. Dog bows use latex bands or special soft elastics that grip without causing pain.
Small rubber bands made for dogs work well for creating the base of your bow. These come in different sizes to match your dog’s hair thickness. Get a variety pack so you can experiment with what works best.
A fine-toothed comb or dog grooming comb helps you section and smooth the hair before adding the bow. This tool prevents tangles and makes sure you’re grabbing all the hair you need.
Detangling spray or grooming spray makes the hair easier to work with. These products help smooth flyaways and make the hair more manageable. Just spray a tiny bit before you start.
Treats aren’t optional—they’re essential. You’ll use these to reward your dog throughout the process. Keep small, soft treats nearby so you can quickly reward good behavior.
Scissors are useful for trimming bands if needed, but keep them safely away from your dog’s hair. You’ll mainly use these to cut bands you want to remove later.
Preparing Your Dog’s Hair
Clean, well-groomed hair holds bows much better than dirty or matted fur. You don’t need to bathe your dog right before every bow session, but the hair should be relatively clean.
Brush your dog’s hair thoroughly before attempting to add a bow. Use a slicker brush or pin brush appropriate for your dog’s coat type. Brush gently to remove any tangles or mats. Pay special attention to the top of the head where the bow will go.
If you find knots or tangles, work through them slowly. Spray some detangling solution on the problem areas. Use your fingers or a comb to gently separate the tangled hair. Never pull hard or you’ll hurt your dog and make them afraid of the process.
The hair should be completely dry before you add a bow. Wet hair doesn’t hold accessories well, and damp hair can cause skin irritation under the band. If you just bathed your dog, blow-dry the top knot area until it’s fully dry.
Check the length of the hair. You need enough hair to gather into a small bunch. If your dog’s hair is very short, you might need to wait for it to grow out a bit. Most breeds need at least one to two inches of hair on top of their head to hold a bow securely.
Step-by-Step: The Basic Top Knot Bow
Now we get to the actual process. This method works for most small to medium dogs with long hair on the top of their head.
Step 1: Position your dog comfortably. You can sit them on your lap, on a table with a non-slip mat, or on the floor between your legs. Make sure they feel secure and can’t easily jump away.
Step 2: Spray a light mist of grooming spray on the top of your dog’s head. Don’t drench the hair—just a quick spritz to make it easier to handle.
Step 3: Use your comb to gather the hair from the top of your dog’s head. Start at the stop of the eyes and comb backwards. You want to collect the hair that would normally fall into their eyes.
Step 4: Hold the gathered hair between your thumb and forefinger. Keep a firm but gentle grip. The hair should form a small fountain on top of your dog’s head.
Step 5: Take a small rubber band and wrap it around the base of the hair. Twist the band and wrap it again. You want it secure but not so tight that it pulls on the skin.
Step 6: Attach the bow. Most dog bows come with a band that wraps around the base you just created. Some bows have clips that snap onto the band. Slide the bow’s attachment over the rubber band or clip it on.
Step 7: Adjust the bow so it sits centered and straight. Fluff the hair above the band to make the top knot look full and pretty.
Step 8: Give your dog a treat and lots of praise. Let them know they did a great job sitting still.
The entire process should take less than two minutes once you get the hang of it. Your first few attempts might take longer, and that’s perfectly normal.
Different Bow Styles for Different Dogs
Not all dogs suit the same bow style. The right technique depends on your dog’s breed, hair type, and face shape.
The classic single bow works for most small breeds. You gather all the top hair into one ponytail and add a single bow. This style suits Yorkies, Maltese, and Shih Tzus perfectly.
The double bow or pigtail look uses two bows, one on each side of the head. This style works well for dogs with wider heads or lots of hair. You section the top hair into two parts, creating a mini ponytail on each side.
The side bow places the bow off to one side instead of centered. This asymmetrical look adds personality and works great for dogs who tilt their head a lot. You gather the hair from one side of the head only.
The half-up style takes just some of the top hair and leaves the rest flowing. This works for dogs with extremely long coats. You’re not trying to get all the hair up, just enough to keep it out of their eyes.
Show bows are larger and more elaborate. Professional groomers use these for dog shows. They often involve multiple bands, backcombing for volume, and perfectly tied ribbons. These take more skill but create stunning results.
Keeping Bows in Place All Day
You’ve successfully put the bow in your dog’s hair. Now you want it to stay there. Dogs naturally scratch and shake their heads, which can dislodge accessories.
Secure the base properly. The rubber band at the foundation needs to be tight enough to hold but not so tight it hurts. If the band is too loose, the whole thing will slide out within minutes.
Use enough hair in the top knot. Skimpy little bunches don’t hold well. Gather a decent amount of hair to create a stable base. The more hair you include, the more secure the bow will be.
Pick the right size bow for your dog. Huge bows on tiny dogs create too much weight and pull out easily. Small bows on big dogs don’t have enough grip. Match the bow size to your dog’s head size and hair volume.
Keep your dog from scratching at the bow. If they constantly paw at their head, the bow will come out. Distract them with toys or activities right after you put the bow in. Once they forget it’s there, they’ll usually leave it alone.
Check the bow throughout the day. Sometimes bands loosen or bows shift to the side. A quick adjustment every few hours keeps everything looking neat.
Consider using bow training spray or stay spray. These products help hold the style in place. You spray them lightly on the finished bow to add extra hold.
Common Mistakes to Avoid
Even experienced pet parents make mistakes when putting in dog bows. Learning what not to do saves you time and prevents problems.
Never use human hair ties with metal clasps. These can catch in your dog’s fur and cause pain. They also pull out hair when you remove them. Stick to dog-specific bands.
Don’t pull the hair too tight. You’re styling your dog, not giving them a facelift. Tight bands cause headaches and can damage hair follicles. If you see the skin pulling, you’ve gone too tight.
Avoid leaving bows in 24/7. Your dog’s scalp needs breaks from having hair pulled back. Take the bow out at night or on days when you’re just staying home.
Don’t fight with your dog to keep them still. If your dog gets stressed, stop and try again later. Forcing the issue makes your dog hate bows and makes future styling impossible.
Never cut bands out while they’re still in the hair. You risk cutting your dog’s hair or even their skin. Always carefully unwrap or slide bands off.
Don’t skip the brushing step. Putting a bow in tangled hair just creates worse tangles. Always brush first.
Avoid using bows on matted hair. The bow won’t stay in, and you’ll make the mats worse. Deal with mats before attempting any styling.
Removing Bows Safely
Taking bows out requires just as much care as putting them in. Rough removal can hurt your dog and damage their hair.
Start by calming your dog. Give them a treat and help them settle in a comfortable position. You need them to hold still for bow removal.
Gently remove the decorative bow first. Unclip or slide it off the rubber band underneath. Set the bow aside in a safe place so you don’t lose it.
Locate the end of the rubber band. You’ll see where it overlaps. Use your fingernail or a comb tip to gently lift this section.
Carefully unwind the band. Go slowly and gently. If you feel resistance, stop and check that you haven’t caught extra hair in the band.
Once the band is loose, slide it up and off the top knot. Let the hair fall naturally. Don’t pull or yank.
Immediately brush the area where the bow was. This prevents tangles from forming and helps the hair return to its normal position.
Check the hair and scalp for any redness or irritation. If you see any problems, give your dog a longer break before the next bow session.
Troubleshooting Common Problems
Sometimes things don’t go as planned. Here’s how to fix the most common bow problems.
The bow keeps falling out: You probably didn’t secure the base band tightly enough. Try using a smaller rubber band or wrapping the current one more times. Make sure you’re gathering enough hair in the initial bunch.
Your dog won’t sit still: Break the process into smaller steps. Reward after each tiny step. Practice over several days instead of trying to do everything at once. Some dogs need weeks to get comfortable with bows.
The hair is too slippery: Apply more grooming spray or try a texturizing spray made for dogs. Some dog hair types are naturally silky and need extra help to grip accessories.
The bow sits crooked: The hair bunch isn’t centered. Start over and make sure you’re combing the hair straight back from the center of the forehead. Check that the rubber band sits centered before adding the bow.
Your dog scratches the bow out: Distract them immediately after putting the bow in. Take them for a walk or start a play session. Once they forget about the bow, they usually stop trying to remove it.
The bow looks messy: You might need to brush more thoroughly before starting. Flyaway hairs happen, but you can smooth them with a tiny bit of grooming spray and gentle fingers.
Best Breeds for Hair Bows
While any dog can potentially wear a bow, some breeds are naturals for this style. Their hair type and length make them perfect candidates.
Yorkshire Terriers basically invented the dog bow look. Their long, silky hair on top of their head needs to be tied back. Yorkies look stunning in bows of all sizes and colors.
Maltese dogs have similar hair to Yorkies. Their white coats show off colored bows beautifully. Most Maltese wear bows daily to keep hair out of their eyes.
Shih Tzus have thick, long coats that work wonderfully with bows. They can pull off larger, more dramatic bow styles because they have plenty of hair to work with.
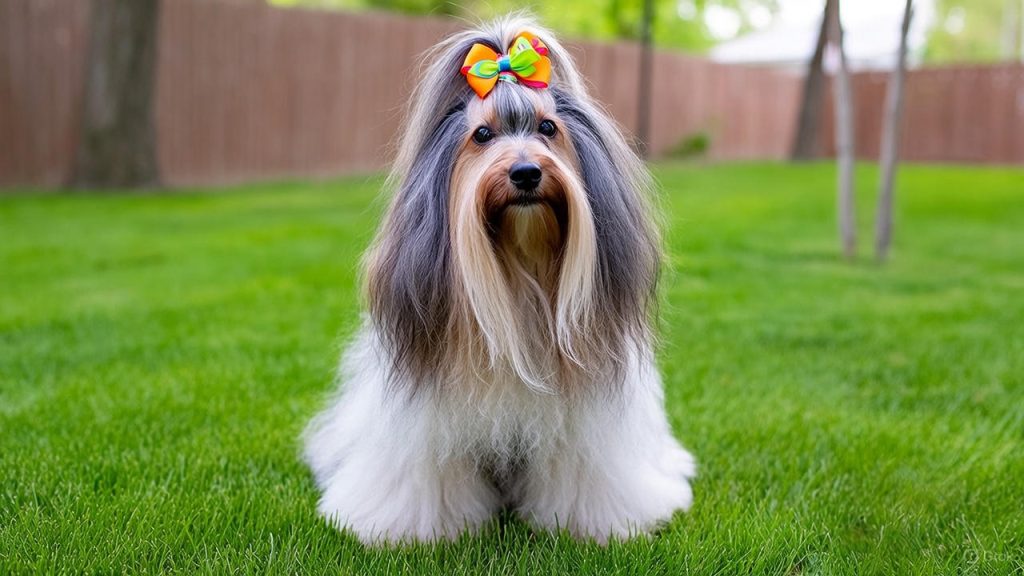
Havanese dogs have soft, flowing hair that holds bows well. Their playful personalities match perfectly with fun, colorful bow choices.
Lhasa Apsos have dense, long coats that need regular grooming. Bows help keep their face hair managed while adding style.
Cocker Spaniels have enough ear and head hair to support small to medium bows. They look especially cute with bows that match their coloring.
Poodles, especially toy and miniature sizes, can wear bows in their topknot hair. Their curly texture actually helps hold bows in place.
Pomeranians have fluffy double coats. While their hair is shorter, they can still wear small bows with the right technique.
Seasonal and Holiday Bow Ideas
Part of the fun of dog bows is changing them up for different occasions. You can create looks for every season and holiday.
Spring calls for pastel bows in pink, lavender, yellow, and mint green. Floral patterns and butterfly designs fit the season perfectly. Easter brings out bunny-themed bows and bright colors.
Summer means bright, bold colors. Think hot pink, turquoise, lime green, and sunny yellow. Beach-themed bows with anchors or starfish add a fun touch. Fourth of July inspires red, white, and blue patriotic bows.
Fall introduces warm colors like orange, burgundy, brown, and gold. Halloween bows might feature pumpkins, ghosts, or little bat designs. Thanksgiving brings out turkey motifs and harvest colors.
Winter showcases red and green Christmas bows. Snowflake patterns and glittery silver bows look magical. New Year’s Eve calls for sparkly, festive bows in gold or silver.
Birthdays deserve special bows. Many pet stores sell bows that say “Birthday Girl” or “Birthday Boy.” You can also get custom bows with your dog’s name.
Don’t forget personal celebrations. Gotcha Day (adoption anniversary) deserves a special bow. So do accomplishments like completing training classes or winning competitions.
Caring for Your Dog Bow Collection
Once you start collecting bows, you’ll want to keep them in good condition. Proper storage and care make them last longer.
Store bows in a dedicated container. Small plastic organizers with compartments work perfectly. You can sort bows by color, season, or size.
Keep bows clean by spot-cleaning them when needed. Use a damp cloth to wipe away any dirt or debris. Let them air dry completely before storing.
Separate different types of bows. Glittery or sequined bows should go in their own compartment so they don’t shed sparkles onto other bows.
Check rubber bands regularly. Old, dried-out bands break easily. Replace them before they snap in your dog’s hair.
Organize by frequency of use. Keep everyday bows where you can easily grab them. Store special occasion bows separately.
Rotate your bows regularly. This prevents some from getting worn out while others stay pristine.
The Bottom Line on Dog Hair Bows
Putting bows in your dog’s hair combines fashion with function. You’re not just making your dog look cute—you’re keeping hair out of their eyes and helping maintain their health.
The process gets easier every time you do it. Your first attempts might feel clumsy, but soon you’ll be able to put in a perfect bow in under a minute. Your dog will also become more comfortable with the routine.
Start simple with basic bows and the standard top knot technique. As you gain confidence, experiment with different styles and looks. Try new colors and seasonal themes. Have fun with it.
Remember that your dog’s comfort comes first. If they truly hate bows after several patient attempts, don’t force it. Some dogs just prefer to go natural, and that’s okay too.
For dogs who enjoy wearing bows, this becomes a special bonding ritual. Many dogs learn to associate bow time with treats and attention. They’ll actually come to you when they see you getting out the grooming supplies.
The skills you learn while mastering dog bows apply to other grooming tasks too. You’ll get better at handling your dog during brushing, nail trimming, and other care activities. The patience and technique you develop serve you well in all aspects of pet care.
So grab some bows, gather your supplies, and give it a try. With practice and patience, you’ll have your pup looking like they just stepped out of a grooming salon. And the pride you’ll feel when people compliment your beautifully styled dog makes all the effort worthwhile.