
How to Put a Dog Cage Together?
Setting up a new dog crate can feel overwhelming when you open the box and see all those metal panels, connectors, and hardware scattered around. Many pet owners struggle with assembly instructions that seem confusing or incomplete. This comprehensive guide walks you through the entire process of assembling your dog’s new home, making the task simple and stress-free.
Essential Tools and Materials You’ll Need
Before you start assembling your wire dog kennel, gather these basic tools. Most dog crate assembly projects require minimal equipment, but having everything ready saves time and prevents frustration.
You’ll need a Phillips head screwdriver for most models. Some manufacturers include a small screwdriver in the package, but a standard-sized one works better. Keep a pair of pliers handy for tightening connections and adjusting wire components. A rubber mallet helps secure stubborn joints without damaging the metal finish.
Check your package contents against the instruction manual. Most wire crates include six panels (four sides, one top, one bottom), corner connectors, door latches, and a plastic tray. Some models come with divider panels for growing puppies. Count all pieces before starting assembly to ensure nothing is missing.
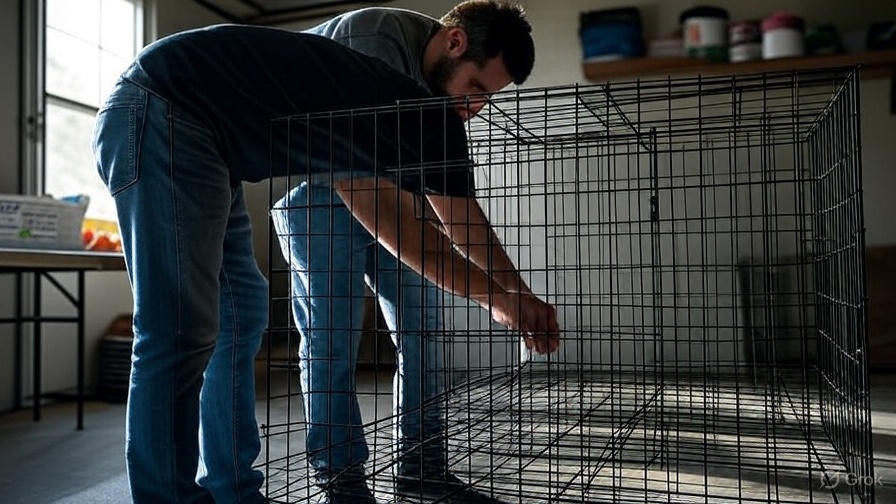
Set up your workspace in an open area with good lighting. A garage, basement, or large living room works well. Lay out all panels on a soft surface like carpet or blankets to prevent scratching the metal coating. This preparation step prevents damage and makes the assembly process smoother.
Preparing Your Assembly Area
Clear a space at least 6 feet by 6 feet around your work area. Dog crates come in various sizes, from small 24-inch models to extra-large 48-inch versions. The largest crates need significant space during assembly, and you’ll want room to move around all sides.
Protect your flooring with old blankets or cardboard. Metal panels can scratch hardwood floors or damage tile surfaces when you move them around. The protective layer also prevents small hardware pieces from rolling away and getting lost.
Good lighting makes a huge difference in assembly speed and accuracy. Position a lamp or work light to illuminate your workspace clearly. Poor lighting leads to mistakes and makes it difficult to see connection points properly.
Keep your instruction manual open and easily accessible. Place it on a table or chair where you can reference it without setting down tools or panels. Many people skip reading the manual, but each brand has slightly different assembly methods and hardware systems.
Understanding Your Dog Crate Components
Wire dog crates consist of several main components that work together to create a secure enclosure. The side panels form the walls of the crate and typically measure the same height. Most models have identical left and right panels, while the back panel may differ slightly in design.
The front panel contains the door mechanism and is usually the most complex piece. Door hinges attach to this panel, and the latch system secures to keep your dog safely inside. Some models have double doors with latches on both sides for easier access.
Top and bottom panels complete the enclosure structure. The bottom panel often has a grid pattern that supports the removable plastic tray. This tray slides in and out for easy cleaning and provides a comfortable surface for your pet.
Corner connectors and clips hold everything together securely. These small metal pieces are crucial for structural integrity. Different manufacturers use various connector styles, including sliding clips, twist-lock mechanisms, and pin-and-hole systems.
Divider panels allow you to adjust the internal space as your puppy grows. These removable panels attach to the crate sides and can be repositioned or removed entirely when your dog reaches full size.
Step-by-Step Assembly Process
Start with the bottom panel placement in your cleared workspace. This panel serves as your foundation and determines the final position of your completed crate. Orient the panel so the tray guides face upward and any connector holes align properly.
Attach the back panel first since it provides stability for the remaining assembly steps. Most back panels have obvious orientation markers or connector locations. Slide the panel connectors into the bottom panel holes until they click or lock into place. Apply gentle pressure to ensure secure connections.
Install the left and right side panels next. These panels should be identical in most models, so either panel can go on either side. Line up the bottom connectors with the base panel holes and the back connectors with the already-installed back panel. The panels should stand upright without support once properly connected.
The front panel requires more attention because of the door mechanism. Check that the door hinges face the correct direction before securing the panel. Most doors should open outward and to the right, but some models vary. Connect the bottom edge first, then secure the side connections.
Position the top panel carefully over the assembled frame. This panel often has the most connection points and can be tricky to align properly. Start by positioning one edge and gradually work around the perimeter, securing each connection point as you go.
Test all connections by gently shaking the assembled frame. Loose connections will create rattling sounds or visible movement. Tighten any loose connectors before proceeding to the final steps.
Installing the Door and Latch System
The door installation process varies significantly between manufacturers, but most follow similar principles. Hinges typically attach to the front panel with removable pins or clips. Some models have hinges that slide onto rails built into the panel frame.
Align the door with the opening and attach the top hinge first. Support the door weight while securing the bottom hinge to prevent binding or misalignment. The door should swing freely without catching on the frame or dragging on the bottom panel.
Install the latch mechanism according to your specific model’s design. Simple slide bolt latches are common on basic models, while premium crates often feature dual-latch systems for added security. Test the latch operation several times to ensure smooth function.
Adjust the door alignment if it doesn’t close properly. Most crates allow minor adjustments by repositioning hinges or bending the door frame slightly. The door should close completely without gaps that your dog could exploit.
Some models include additional security features like double-latch systems or lock-compatible hasps. Install these components according to the manufacturer’s instructions, ensuring they don’t interfere with normal door operation.
Adding the Plastic Tray and Divider Panels
Slide the plastic tray into the bottom of the crate through the front opening. The tray should fit snugly against all four walls without buckling or binding. Some models have guides or rails that help position the tray correctly.
Clean the tray before first use with mild soap and water. New plastic components sometimes have manufacturing residue or sharp edges that need attention. Rinse thoroughly and dry completely before placing it in the crate.
Install divider panels if your crate includes them. These panels typically attach to the side walls with clips or hooks and can be positioned anywhere along the crate length. Start with the divider positioned to create a space just large enough for your puppy to stand, turn around, and lie down comfortably.
Mark the divider position with a piece of tape so you can move it consistently as your puppy grows. Most puppies need the space expanded every few weeks during their rapid growth phase.
Test the divider stability by applying gentle pressure. The panel should remain firmly in place but still allow easy repositioning when needed. Loose dividers can be dangerous if they fall on your pet.
Safety Checks and Final Adjustments
Inspect every connection point for proper engagement and security. Loose connections can fail unexpectedly, potentially allowing your dog to escape or causing injury. Pay special attention to corners where multiple panels meet.
Check all wire ends for sharp points or rough edges. Manufacturing processes sometimes leave burrs or sharp spots that can injure your pet. File down any rough areas with a metal file or sandpaper.
Test the door latch operation multiple times from both inside and outside the crate. The latch should engage easily but require deliberate action to release. Some dogs learn to manipulate simple latches, so observe your pet’s behavior during initial use.
Verify that the plastic tray sits level and doesn’t shift when moved. An unstable tray can create uncomfortable sleeping conditions and may allow waste to leak onto your floor.
Examine the entire structure for stability by applying gentle pressure to different areas. The crate should feel solid and not rock or flex excessively. Minor movement is normal, but significant instability indicates connection problems.
Common Assembly Mistakes to Avoid
Many people rush through the assembly process and make simple mistakes that compromise safety or functionality. Taking time to follow instructions carefully prevents most problems and saves time in the long run.
Backwards panel installation is extremely common, especially with side panels that look identical. Most panels have subtle differences in connector placement or orientation. Double-check panel positions before securing all connections.
Over-tightening connectors can damage the metal finish or strip connection threads. Apply firm pressure but stop when connections feel secure. Damaged connectors may not hold properly and can be difficult to repair.
Skipping the instruction manual leads to assembly errors and missed safety features. Each manufacturer has specific assembly sequences and safety requirements. Even experienced pet owners should review the manual for unfamiliar models.
Forcing connections that don’t align properly usually indicates incorrect panel orientation or damaged components. Stop and reassess the assembly before applying excessive force that could damage the crate permanently.
Ignoring safety checks after assembly can lead to dangerous situations. Always test door latches, connection security, and structural stability before introducing your pet to the new crate.
Maintenance and Long-Term Care
Regular maintenance keeps your dog crate functioning properly and extends its useful life. Weekly inspections help identify potential problems before they become serious safety issues.
Check all connection points monthly for loosening or wear. Normal use and your dog’s movement can gradually loosen connections over time. Tighten loose connections immediately to maintain structural integrity.
Clean the metal components with mild soap and water as needed. Avoid harsh chemicals or abrasive cleaners that can damage protective coatings. Dry all surfaces thoroughly to prevent rust formation.
Inspect the plastic tray regularly for cracks or damage. Replace damaged trays immediately since sharp edges can injure your pet. Most manufacturers sell replacement trays separately.
Store disassembled crates in a dry location if not in regular use. Clean and dry all components before storage to prevent corrosion or damage. Keep hardware in labeled bags to prevent loss.
Troubleshooting Common Problems
Door alignment problems often result from incorrect hinge installation or bent door frames. Remove the door completely and reinstall, ensuring proper hinge alignment. Minor frame bending can sometimes be corrected by gentle manipulation.
Rattling sounds usually indicate loose connections or missing hardware. Systematically check each connection point and tighten as needed. Replace any missing clips or connectors with parts from the manufacturer.
Unstable structures typically result from incomplete connections or damaged components. Disassemble the affected area and reassemble carefully, ensuring all connections engage properly.
Rust formation on metal components indicates moisture exposure or coating damage. Clean affected areas immediately and apply touch-up paint designed for metal surfaces. Store the crate in a drier location to prevent recurrence.
Conclusion
Assembling a dog crate correctly creates a safe, comfortable space for your pet while providing you with peace of mind. Taking time to follow proper assembly procedures and safety checks ensures years of reliable use. Remember that each manufacturer has specific requirements, so always consult your instruction manual alongside this general guide.
The investment in proper assembly pays dividends in safety, durability, and your pet’s comfort. A well-assembled crate becomes a valuable tool for house training, travel, and providing your dog with a secure retreat space. Regular maintenance and safety checks keep the crate functioning properly throughout its useful life.
Your dog’s safety depends on proper crate assembly and maintenance. Never compromise on connection security or structural integrity, and replace damaged components immediately. With proper care, a quality dog crate provides years of reliable service for you and comfortable shelter for your beloved pet.