How to Hang a Birdhouse?
Bird enthusiasts across the country enjoy watching feathered friends visit their yards. Installing a birdhouse creates a welcoming environment that attracts various species while providing essential nesting sites. This comprehensive guide walks you through every step of properly hanging your birdhouse to maximize bird activity and ensure long-lasting results.
Why Proper Birdhouse Placement Matters
The success of your backyard bird sanctuary depends heavily on strategic placement. Birds seek specific conditions when searching for nesting locations, including safety from predators, protection from harsh weather, and easy access to food sources. A poorly positioned birdhouse often remains empty throughout the breeding season.
Studies show that correctly installed birdhouses experience 75% higher occupancy rates compared to randomly placed ones. The height, direction, and mounting method all influence which bird species will consider your house suitable for raising their young.
Essential Tools and Materials You’ll Need
Before starting your installation project, gather these necessary items:
Basic Tools:
- Drill with various bit sizes
- Level for accurate positioning
- Measuring tape
- Screwdriver set
- Hammer
- Wire cutters
- Pliers
Mounting Hardware:
- Galvanized screws (2.5 to 3 inches long)
- Wall anchors for masonry surfaces
- Metal mounting brackets
- Galvanized wire or cable
- Pole mounting systems
- Tree straps (for trunk mounting)
Safety Equipment:
- Safety glasses
- Work gloves
- Sturdy ladder
- Non-slip shoes
Maintenance Supplies:
- Weather-resistant wood sealant
- Predator guards
- Drainage materials
- Cleaning brushes
Quality materials ensure your birdhouse installation withstands seasonal weather changes and provides years of reliable service.
Step-by-Step Installation Process
Planning Your Installation
Start by examining your yard layout and identifying potential mounting locations. Walk around your property during different times of day to observe sunlight patterns, wind direction, and existing wildlife activity. Note areas where cats frequently roam, as these locations should be avoided.
Mark potential spots with temporary stakes or flags. Take measurements from nearby structures, trees, and fence lines to ensure adequate spacing between multiple birdhouses.
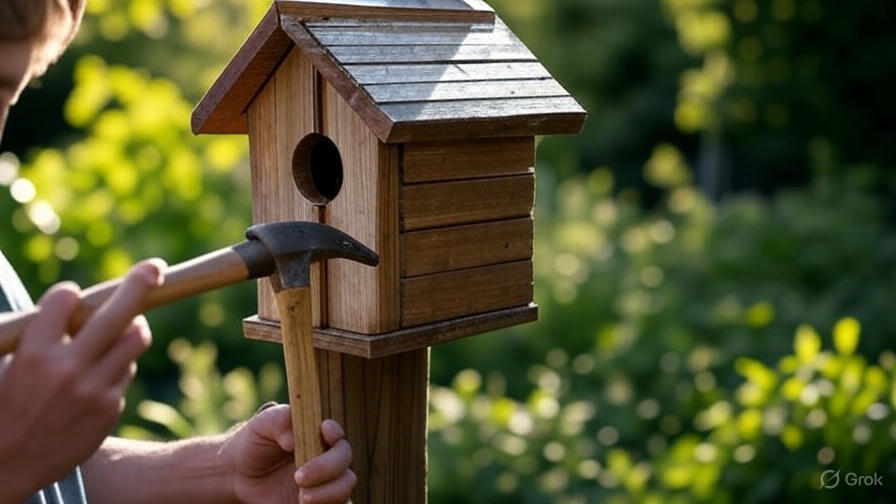
Preparing the Mounting Surface
Clean the selected mounting area thoroughly, removing dirt, debris, and loose bark if attaching to trees. For wall installations, locate wall studs using a stud finder to ensure secure attachment points. Mark stud locations with pencil marks.
Test your drill bits on scrap material to confirm proper hole sizes for your specific hardware. Pre-drilling prevents wood splitting and ensures clean, professional-looking installations.
Installing Wall-Mounted Birdhouses
Position your birdhouse against the wall at the desired height, typically 5-6 feet for most songbird species. Use a level to ensure the house sits perfectly straight. Mark screw hole locations with a pencil.
Drill pilot holes slightly smaller than your screw diameter. This prevents the wood from cracking while providing sufficient grip. Insert wall anchors if drilling into masonry or hollow walls.
Attach the mounting bracket first, then secure the birdhouse to the bracket. This two-step process allows for easier adjustments and future maintenance access.
Pole Mounting Technique
Pole mounting offers excellent stability and predator protection when done correctly. Begin by digging a hole approximately 18-24 inches deep, depending on your soil conditions and pole height.
Set the pole in concrete for maximum stability. Mix quick-setting concrete according to package directions and pour around the pole base. Use a level to keep the pole perfectly vertical while the concrete sets.
Allow 24-48 hours for complete curing before attaching your birdhouse. This patience prevents shifting that could compromise the entire installation.
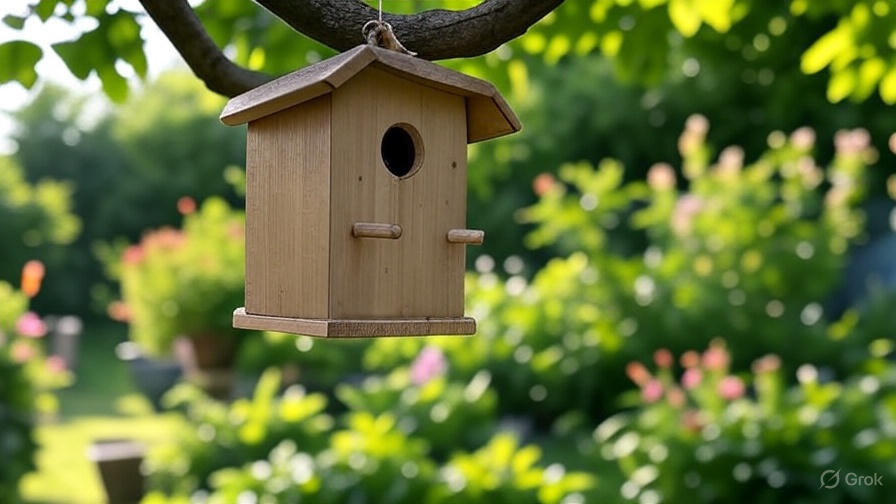
Tree Mounting Methods
Tree installation requires special consideration to avoid damaging the bark and cambium layer. Use wide tree straps or mounting bands that distribute weight evenly across the trunk surface.
Never hammer nails or screws directly into living trees, as this creates entry points for insects and diseases. Galvanized wire wrapped around protective bark guards provides secure attachment without permanent damage.
Position the birdhouse on the side of the tree that receives morning sunlight but afternoon shade. This orientation keeps the interior comfortable during hot summer days.
Optimal Height Guidelines for Different Bird Species
Different bird species prefer specific mounting heights based on their natural nesting behaviors:
Ground-level to 3 feet: House wrens and chickadees often accept lower installations, especially in areas with minimal predator pressure.
4-6 feet above ground: This range works well for bluebirds, nuthatches, and most common backyard songbirds. The height provides safety while remaining accessible for monitoring and maintenance.
6-8 feet elevation: Purple martins and some woodpecker species prefer higher installations that offer better territorial views and increased security.
8-12 feet or higher: Specialized species like wood ducks and some owl varieties require elevated positions that mimic their natural tree cavity preferences.
Consider your local bird population when determining installation height. Research which species commonly visit your area to optimize your birdhouse appeal.
Direction and Orientation Best Practices
Compass direction plays a crucial role in birdhouse success. Face the entrance hole toward the east or southeast to capture gentle morning sunlight while avoiding harsh afternoon heat.
North-facing entrances work well in extremely hot climates where temperature control becomes critical. South-facing openings should be avoided in most regions as they create uncomfortably warm interior conditions.
Tilt the birdhouse slightly forward (approximately 5-10 degrees) to encourage rainwater runoff and improve drainage. This subtle angle prevents water accumulation that could lead to mold growth or structural damage.
Weather Protection Strategies
Protect your birdhouse from seasonal weather extremes through thoughtful positioning and protective accessories. Install rain guards or extended roof overhangs to shield the entrance from driving rain.
Wind protection becomes especially important in exposed locations. Position birdhouses near natural windbreaks like shrubs or fences, but maintain adequate clearance for easy bird access.
Snow load considerations apply in northern climates where heavy accumulation could damage mounting hardware. Reinforce attachment points and consider removable installations in extreme weather regions.
Predator Prevention Techniques
Predator guards significantly improve nesting success rates by deterring cats, snakes, raccoons, and other threats. Install metal pole guards on post-mounted houses to prevent climbing predators from reaching the entrance.
Maintain adequate spacing from tree branches and nearby structures. A minimum 4-foot clearance prevents jumping access while still allowing parent birds comfortable approach routes.
Entrance hole size directly impacts predator exclusion. Use species-specific measurements to prevent larger birds or mammals from entering while accommodating your target species.
Distance Requirements Between Multiple Birdhouses
Space multiple birdhouses appropriately to prevent territorial conflicts between nesting pairs. Most songbird species require 25-30 feet between houses of the same type.
Different species often coexist peacefully in closer proximity. Bluebird houses can be paired with wren houses at 15-20 foot intervals, as these species don’t typically compete for the same resources.
Create birdhouse trails in larger yards by spacing installations at proper intervals along fence lines or property boundaries. This arrangement maximizes your yard’s nesting capacity while respecting natural territorial behaviors.
Maintenance Access Considerations
Plan for regular maintenance needs during initial installation. Position birdhouses where you can safely reach them with a ladder for annual cleaning and repairs.
Install hinged or removable panels that allow interior access without disturbing the entire mounting system. This feature proves invaluable during breeding season monitoring and post-season cleaning.
Mark maintenance dates on your calendar to establish consistent care routines. Annual cleaning prevents parasite buildup and extends birdhouse lifespan significantly.
Seasonal Timing for Installation
Install new birdhouses during late winter or early spring, before breeding season begins. This timing allows birds to discover and inspect potential nesting sites before making territorial commitments.
Fall installation works well in mild climates where year-round activity occurs. Birds often use winter shelter, so autumn placement provides immediate value even before nesting season arrives.
Avoid mid-summer installations when birds are actively raising young. Disturbance during this critical period can cause nest abandonment and reproductive failure.
Common Installation Mistakes to Avoid
Many well-intentioned bird enthusiasts make installation errors that reduce birdhouse effectiveness. Avoid these frequent mistakes:
Mounting too low: Ground predators easily access birdhouses installed below 4 feet. Even well-meaning installations often fail due to insufficient height.
Wrong entrance direction: South and west-facing openings create overheated interior conditions that birds find uncomfortable or dangerous.
Inadequate drainage: Poor drainage leads to wet conditions that promote disease and discourage occupancy.
Overcrowding installations: Too many birdhouses in small areas create territorial stress and reduce overall success rates.
Neglecting maintenance access: Inaccessible installations often go uncleaned, leading to parasite problems and structural deterioration.
Long-term Care and Monitoring
Successful birdhouse management extends far beyond initial installation. Establish regular monitoring routines to track occupancy, identify problems, and make necessary adjustments.
Weekly observation during breeding season helps you understand usage patterns and species preferences. Keep a simple log noting which houses are occupied, species identification, and behavioral observations.
Annual deep cleaning removes old nesting materials and prevents parasite accumulation. Use mild soap solutions and allow complete drying before closing access panels.
Inspect mounting hardware annually for signs of wear, corrosion, or loosening. Replace worn components promptly to prevent costly failures during severe weather events.
Troubleshooting Common Issues
Empty birdhouses often indicate placement problems rather than construction defects. Evaluate height, direction, and local habitat conditions if occupancy remains low after a full breeding season.
Predator problems require immediate attention to prevent repeated losses. Add or upgrade guards, adjust positioning, or relocate installations to safer locations.
Weather damage typically occurs at mounting points where water infiltration causes hardware failure. Regular inspection and prompt repairs prevent minor issues from becoming major problems.
Pest infestations sometimes develop in poorly maintained houses. Establish consistent cleaning schedules and use appropriate pest deterrents when necessary.
Conclusion
Properly hanging a birdhouse requires attention to detail, species-specific knowledge, and commitment to ongoing maintenance. The reward comes in watching generations of birds successfully raise their young in the safe haven you’ve created.
Start with one or two well-positioned birdhouses and expand your installations based on observed success and local bird populations. Each installation teaches valuable lessons that improve future projects and increase your overall success rate.
Take time to observe and enjoy the birds that visit your carefully installed houses. The combination of proper technique, quality materials, and consistent care creates a backyard bird sanctuary that provides years of enjoyment while supporting local wildlife populations.
Your effort in following these detailed installation guidelines will be rewarded with increased bird activity, successful nesting outcomes, and the satisfaction of contributing to wildlife conservation in your own backyard.