How to Clean Pigs Feet?
Pigs feet remain one of the most flavorful and nutritious cuts of pork, yet many home cooks avoid them simply because they don’t know how to clean them properly. This comprehensive guide will walk you through every step of the cleaning process, transforming these intimidating ingredients into perfectly prepared delicacies ready for your favorite recipes.
Why Clean Pigs Feet Properly
Raw pigs feet arrive at your kitchen with hair, dirt, and other debris that must be removed before cooking. Proper cleaning ensures food safety while preserving the rich flavor and gelatinous texture that makes this cut so prized in cuisines worldwide. When you clean pigs feet correctly, you unlock their potential for creating hearty stews, flavorful broths, and tender braised dishes.
The cleaning process also removes any unpleasant odors and residual blood, leaving you with clean, fresh-smelling meat ready for seasoning and cooking. Professional chefs understand that thorough preparation creates the foundation for exceptional dishes.
Essential Tools and Supplies
Before starting the cleaning process, gather these necessary items:
Sharp knife – A sturdy butcher’s knife or chef’s knife works best for trimming and scraping Cutting board – Use a dedicated board for raw meat to prevent cross-contamination Large bowl – For soaking and rinsing the feet Kitchen shears – Helpful for trimming tough areas and removing stubborn debris Coarse salt – Acts as an abrasive to help remove dirt and odors White vinegar – Natural cleaning agent that neutralizes odors Scrub brush – A clean vegetable brush or nail brush works perfectly Paper towels – For drying and cleaning surfaces Disposable gloves – Optional but recommended for hygiene
Having all these tools ready streamlines the cleaning process and prevents interruptions that could compromise food safety.
Initial Inspection and Preparation
Start by examining each pig’s foot carefully under good lighting. Look for any obvious dirt, hair, or damaged areas that need special attention. Fresh pigs feet should have a pinkish color with minimal odor.
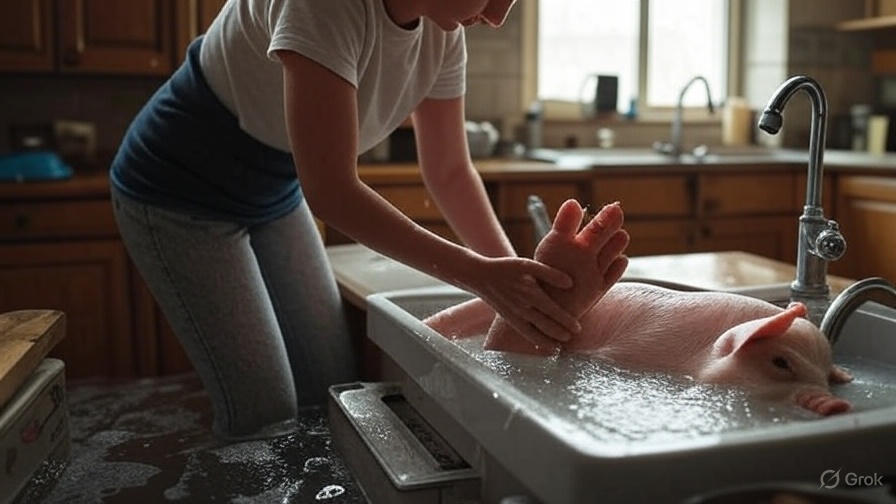
Rinse the feet under cold running water to remove surface dirt and debris. This preliminary rinse helps you see what areas need the most attention during the deep cleaning process. Pat the feet dry with paper towels before proceeding to the next step.
Check for any small stones, wood chips, or other foreign objects that might be embedded in crevices. Remove these carefully with your knife tip or kitchen shears. This inspection phase prevents unpleasant surprises later in the cooking process.
Step-by-Step Deep Cleaning Method
Step 1: Soak in Salt Water
Fill a large bowl with cold water and add two tablespoons of coarse salt per quart of water. Submerge the pigs feet completely and let them soak for 30 minutes. The salt water helps draw out impurities and begins the odor-removal process.
During this soaking time, the salt water penetrates into crevices and loosens stubborn dirt. This step makes the subsequent scrubbing much more effective and reduces the overall cleaning time.
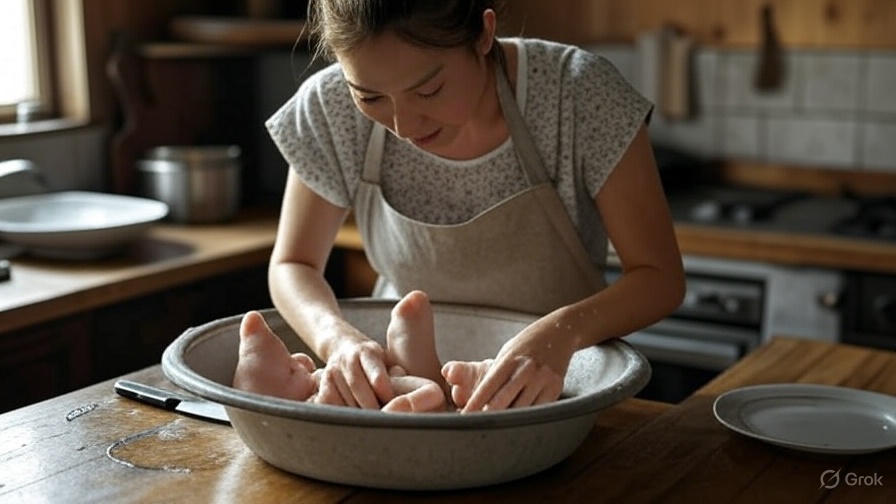
Step 2: Scrub Away Hair and Debris
After soaking, remove one foot at a time and scrub thoroughly with your brush. Work in circular motions, paying special attention to the areas between toes and around joints where dirt accumulates most.
Focus on removing any remaining hair by scrubbing against the grain. The soaking has softened these elements, making removal much easier. Rinse frequently under cold running water to wash away loosened debris.
For particularly stubborn hair, use your knife to scrape gently in the direction opposite to hair growth. Be careful not to cut into the skin, as this can affect the final texture of your cooked dish.
Step 3: Vinegar Treatment
Create a solution using one part white vinegar to three parts cold water. Soak the scrubbed feet in this mixture for 15 minutes. The vinegar neutralizes any remaining odors and provides additional cleaning power.
This acidic treatment also helps break down any remaining protein residue and ensures your pigs feet will have a clean, neutral smell when cooked. The vinegar solution reaches areas that mechanical scrubbing might miss.
Step 4: Final Trimming
Remove the feet from the vinegar solution and inspect each one closely. Use your sharp knife to trim away any remaining bits of hair, loose skin, or damaged tissue. Make clean cuts to maintain the foot’s shape and appearance.
Pay particular attention to the nail areas and the spaces between toes. These spots often harbor debris that earlier steps might have loosened but not completely removed. Clean trimming creates a more appetizing final product.
Step 5: Thorough Final Rinse
Rinse each cleaned foot under cold running water for at least one minute. Make sure water flows into all crevices and removes any traces of salt or vinegar. The water should run clear when the foot is properly cleaned.
Turn each foot in your hands to ensure water reaches every surface. This final rinse removes cleaning residue and prepares the meat for cooking or storage.
Advanced Cleaning Techniques
Dealing with Tough Stains
Some pigs feet arrive with stubborn stains that resist standard cleaning methods. Create a paste using baking soda and water, then rub this mixture onto stained areas. Let it sit for 10 minutes before scrubbing with your brush.
The alkaline properties of baking soda help break down protein stains and discoloration. This technique works particularly well on feet that have been frozen or stored for extended periods.
Removing Strong Odors
If your pigs feet have a particularly strong smell, extend the vinegar soaking time to 30 minutes. You can also add a tablespoon of lemon juice to the vinegar solution for extra odor-fighting power.
Another effective method involves rubbing coarse salt directly onto the feet, letting it sit for 10 minutes, then scrubbing vigorously before rinsing. The salt acts as both an abrasive and an odor absorber.
Split Foot Cleaning
Some recipes call for split pigs feet, which expose the bone marrow and internal structures. These require extra attention to remove bone fragments and blood clots.
Use your knife tip to carefully clean out the marrow cavity, removing any dark spots or coagulated blood. Rinse the interior thoroughly under running water, using your finger to ensure all debris is removed.
Food Safety Considerations
Always work with pigs feet on a dedicated cutting board that won’t be used for other foods until properly sanitized. Cross-contamination poses serious health risks, especially when working with raw pork.
Wash your hands thoroughly with soap and warm water for at least 20 seconds after handling raw pigs feet. Clean and sanitize all tools and surfaces immediately after use to prevent bacterial growth.
Keep pigs feet refrigerated at 40°F or below throughout the cleaning process. Never leave them at room temperature for more than two hours, as this creates ideal conditions for harmful bacteria to multiply.
Storage After Cleaning
Clean pigs feet can be stored in the refrigerator for up to three days before cooking. Wrap them individually in plastic wrap or place them in airtight containers to prevent odor transfer to other foods.
For longer storage, clean pigs feet freeze well for up to six months. Wrap them tightly in freezer paper or vacuum-seal them to prevent freezer burn. Label packages with the cleaning date for easy tracking.
When freezing, consider portioning the feet according to your typical recipe requirements. This approach eliminates waste and makes meal planning more convenient.
Common Cleaning Mistakes to Avoid
Many home cooks rush through the soaking phase, but adequate soaking time is crucial for effective cleaning. Short soaking periods leave debris embedded in crevices, creating unpleasant textures in the finished dish.
Using hot water during cleaning might seem logical, but it actually sets proteins and makes hair removal more difficult. Cold water keeps proteins loose and makes scrubbing more effective.
Skipping the vinegar treatment is another common mistake. This step eliminates odors that cooking alone cannot remove, ensuring your finished dish has a clean, appetizing smell.
Preparing for Different Cooking Methods
The final cleaning steps vary slightly depending on your intended cooking method. For braising or stewing, ensure all loose skin is removed to prevent it from separating during long cooking times.
If you plan to grill or roast the feet, pay extra attention to removing hair from areas that will be directly exposed to heat. Remaining hair can create unpleasant flavors and aromas during high-temperature cooking.
For soup or broth making, clean the feet thoroughly but don’t worry about perfect appearance, since they’ll be strained out of the final product. Focus on removing debris that could cloud the broth or create off-flavors.
Nutritional Benefits of Properly Cleaned Pigs Feet
Clean pigs feet provide excellent sources of collagen, protein, and essential minerals. The collagen breaks down during cooking to create rich, flavorful gelatin that enhances both taste and nutrition.
These cuts contain significant amounts of calcium, phosphorus, and magnesium, which support bone health. The protein content helps maintain muscle mass and provides lasting satiety.
Proper cleaning preserves these nutritional benefits while eliminating contaminants that could interfere with nutrient absorption or create digestive issues.
Traditional and Modern Cooking Applications
Once properly cleaned, pigs feet adapt to numerous cooking styles and cultural preparations. Southern cuisine features them in hearty stews and pickled preparations that showcase their unique texture.
Asian cuisines often braise cleaned pigs feet with soy sauce and aromatics, creating tender, flavorful dishes that highlight the meat’s natural richness. The cleaning process ensures these delicate flavors aren’t masked by impurities.
Modern molecular gastronomy techniques use the natural gelatin from clean pigs feet to create innovative textures and presentations. Proper cleaning becomes even more critical in these applications, where any impurities would be magnified.
Conclusion
Cleaning pigs feet properly transforms an intimidating ingredient into a versatile, delicious addition to your culinary repertoire. The process requires patience and attention to detail, but the results justify the effort invested.
Master these cleaning techniques, and you’ll unlock the full potential of this economical, nutritious cut of meat. Your properly cleaned pigs feet will reward you with rich flavors, satisfying textures, and the satisfaction of preparing traditional foods with skill and confidence.
The key lies in taking your time, using the right tools, and following each step thoroughly. With practice, you’ll develop the skills to clean pigs feet efficiently while maintaining the highest standards of food safety and quality. Your family and guests will appreciate the care you’ve taken in preparing these special dishes.