
Pet owners everywhere have embraced smart pet feeders as convenient solutions for busy lifestyles. These devices ensure our furry friends get their meals on time, even when we're not home. But like any item that handles food, smart pet feeders need regular cleaning to prevent bacteria growth, mold, and unpleasant odors. A clean feeder ensures your pet gets healthy meals and extends the life of your device. Let's dive into the complete guide on keeping your smart pet feeder spotless.
Why Regular Cleaning Matters
Smart pet feeders handle food daily. Without proper cleaning, these devices become breeding grounds for bacteria and mold. Food residue sticks to various parts of the feeder, creating potential health hazards for your pets.
Regular cleaning:
- Prevents bacterial contamination of pet food
- Stops mold growth in food storage areas
- Removes unpleasant smells that might repel your pet
- Maintains the proper functioning of mechanical parts
- Extends the lifespan of your investment
- Keeps your pet healthy and happy
Most vets recommend cleaning pet food bowls daily and doing a deep clean of feeding equipment weekly. Smart feeders need similar attention.
Gathering Your Cleaning Supplies
Before starting the cleaning process, collect everything you'll need:
- Dish soap (mild, pet-safe varieties work best)
- Warm water
- Soft cloths or sponges
- Cotton swabs for tight spots
- Old toothbrush for scrubbing small areas
- Vinegar solution (one part white vinegar to three parts water)
- Baking soda for tough stains or odors
- Microfiber cloth for drying
- Isopropyl alcohol (70%) for sanitizing electronic components
- Bowl or basin for soaking removable parts
Having everything ready streamlines the cleaning process and ensures you won't skip any steps due to missing supplies.
Step-by-Step Cleaning Process
1. Unplug and Disassemble
Safety comes first when dealing with electronic devices:
- Turn off and unplug your smart feeder
- Remove all pet food from the storage container
- Disassemble all removable parts according to manufacturer instructions
- Take photos during disassembly if you're worried about remembering how to put it back together
- Set aside any electronic components that can't be submerged in water
Most smart feeders have several removable parts, including food containers, dispensing mechanisms, food bowls, and lids. Check your specific model's manual for disassembly instructions.
2. Handling Electronic Components
Smart feeders contain sensitive electronics that require special care:
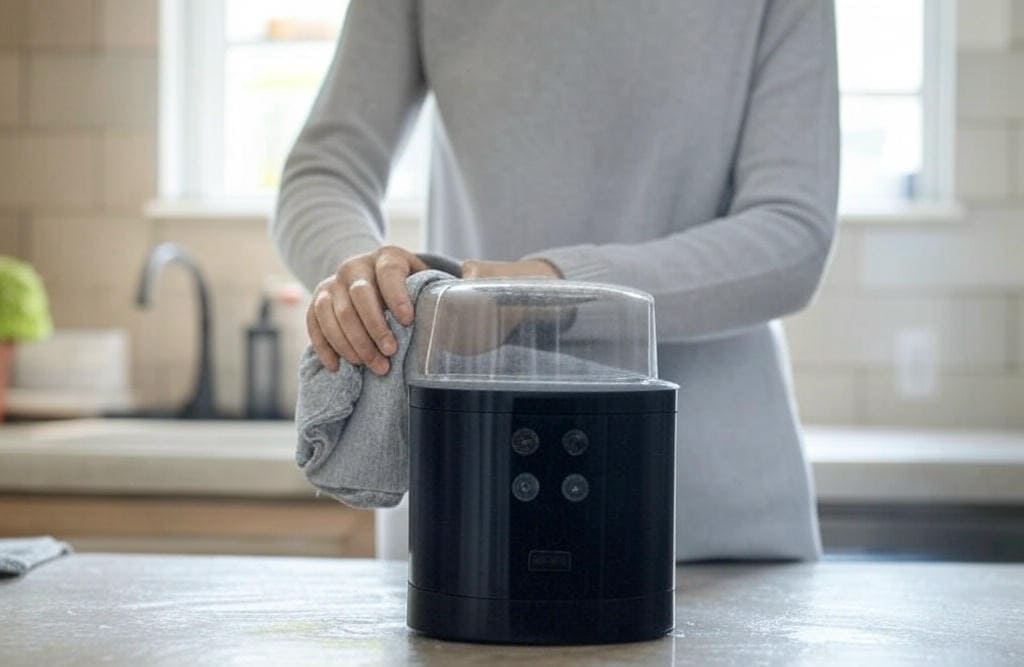
- Wipe down the main unit with a slightly damp cloth
- Clean buttons and display screens with a microfiber cloth slightly dampened with isopropyl alcohol
- Use cotton swabs to clean around buttons and small crevices
- Never submerge the main unit or electronic parts in water
- Allow electronic components to air dry completely before reassembly
Some models have detachable electronic components that should be cleaned separately and with extra care.
3. Washing Removable Parts
Now focus on the parts that directly contact food:
- Rinse all removable parts with warm water to remove loose debris
- Fill a basin with warm, soapy water
- Soak non-electronic removable parts for 5-10 minutes
- Scrub each component thoroughly with a soft cloth or sponge
- Pay special attention to corners and crevices where food particles hide
- Use an old toothbrush for hard-to-reach areas
- Rinse everything thoroughly with clean water
- Ensure no soap residue remains as it could make your pet sick
For stubborn food residue, create a paste with baking soda and water, apply to the problem areas, let sit for 10 minutes, then scrub and rinse thoroughly.
4. Dealing With Food Containers
The food storage container requires special attention:
- Empty all food and shake out crumbs
- Wipe down the interior with a damp cloth
- For plastic containers, make a solution of one part vinegar to three parts water
- Wipe down the interior with this solution to disinfect and remove odors
- Rinse thoroughly if using vinegar solution
- Dry completely before refilling with food
Never refill the container while it's still damp, as moisture can cause food to spoil or become moldy.
5. Cleaning the Food Dispensing Mechanism
The dispensing mechanism often collects food particles:
- Check for jammed food in the dispensing chute
- Use compressed air to blow out stubborn particles
- Wipe down with a damp cloth
- For sticky residue, use the vinegar solution
- Dry thoroughly before reassembly
The dispensing mechanism affects how well your feeder works, so thorough cleaning here prevents malfunction.
6. Sanitizing Food Contact Surfaces
After cleaning, sanitizing food-contact surfaces adds an extra layer of protection:
- Create a sanitizing solution with one tablespoon of bleach per gallon of water
- Alternatively, use pet-safe sanitizers available at pet stores
- Apply the solution to food bowls and food contact areas
- Let the solution sit for 2 minutes
- Rinse thoroughly with clean water
- Make sure no sanitizer residue remains
For pet owners uncomfortable using bleach, food-grade hydrogen peroxide serves as an alternative sanitizer.
7. Complete Drying
Proper drying prevents mold growth:
- Air dry all components on a clean towel
- Ensure all parts are completely dry before reassembly
- Use a microfiber cloth to speed up the drying process
- Pay extra attention to crevices and corners where water might collect
- Allow several hours of drying time, especially for parts with complex shapes
Complete drying might take time but rushing this step risks mold growth and component damage.
8. Reassembly and Testing
Once everything is clean and dry:
- Refer to your photos or manual for reassembly guidance
- Make sure all components fit together properly
- Plug in the feeder and run a test cycle with a small amount of food
- Check that the dispensing mechanism works correctly
- Reset any settings that might have been disturbed during cleaning
Proper reassembly ensures your feeder works correctly and safely.
Maintaining Different Types of Smart Feeders
Gravity-Fed Smart Feeders
Gravity feeders use less complex mechanisms but still need regular cleaning:
- Focus on the food reservoir and dispensing chute
- Check for clogging that might prevent proper food flow
- Clean the feeding bowl daily even if the reservoir gets cleaned less frequently
Automated Portion Control Feeders
These more complex feeders have additional considerations:
- Clean the portioning mechanism thoroughly
- Check for food stuck in measuring cups or dispensers
- Ensure sensors are clean and free from food dust
- Test the portioning accuracy after cleaning
Wet Food Smart Feeders
Feeders designed for wet food need extra attention:
- Clean after each use since wet food spoils quickly
- Check refrigeration components if your model has them
- Pay special attention to seals and gaskets that prevent air exposure
- Consider more frequent deep cleaning due to the nature of wet food
Creating a Cleaning Schedule
Consistent cleaning maintains your feeder in top condition:
Daily Tasks
- Wipe down exterior surfaces
- Clean the food bowl
- Check for food blockages
- Remove any visible debris
Weekly Tasks
- Disassemble and clean all removable parts
- Sanitize food contact surfaces
- Clean the food storage container
- Check and clean the dispensing mechanism
Monthly Tasks
- Deep clean all components
- Check batteries or power connections
- Inspect for wear and tear on parts
- Update firmware if necessary
Set reminders on your phone or mark your calendar to establish a regular cleaning routine.
Troubleshooting Common Issues
Even with regular cleaning, you might encounter problems:
Persistent Odors
- Try baking soda paste on affected areas
- Leave baking soda in the empty container overnight
- Consider activated charcoal sachets near (not in) the food storage
Sticky Residue
- Use a vinegar solution soak for 30 minutes
- Try rubbing alcohol on non-food contact surfaces
- For severe cases, enzyme cleaners designed for pet products can help
Mold Spots
- Increase cleaning frequency
- Ensure complete drying before reassembly
- Check room humidity levels where the feeder is placed
- Consider moving the feeder to a drier location
Mechanical Issues After Cleaning
- Check for water damage on electronic components
- Ensure all parts are completely dry before reassembly
- Verify all components are seated correctly
- Reference your manual for troubleshooting steps
The Benefits of Regular Maintenance
Committing to regular cleaning offers numerous benefits:
- Your pet consumes fresh, uncontaminated food
- The feeder operates reliably without jams or malfunctions
- You save money by extending the life of the device
- You avoid emergency vet visits caused by foodborne illness
- Your home stays free of pet food odors
The small time investment in regular cleaning pays off in both pet health and device longevity.
When to Replace Parts
Even with diligent cleaning, some components wear out:
- Food bowls with scratches or cracks should be replaced
- Worn gaskets or seals that no longer form tight connections need replacement
- Dispensing mechanisms that show signs of wear might need professional service
- Batteries in battery-operated models require regular replacement
Check with the manufacturer about replacement parts availability for your specific model.
Final Thoughts
Keeping your smart pet feeder clean ensures your pet receives safe, fresh food while protecting your investment. By following this comprehensive guide and establishing a regular cleaning routine, you'll extend the life of your device and safeguard your pet's health.
Remember that different models have specific cleaning requirements, so always check your manufacturer's instructions. With proper care, your smart pet feeder will serve you and your furry friend reliably for years to come.
Your pet deserves fresh food served in clean dishes---just as you'd want for yourself. Make feeder cleaning part of your regular pet care routine, and both you and your pet will benefit.