How to Clean Dog Paws?
Every dog owner faces the same challenge: muddy paws tracking dirt through their pristine home. Your furry friend bounds through the door after an exciting walk, leaving a trail of paw prints across your freshly cleaned floors. Sound familiar? You’re not alone in this daily struggle.
Keeping your dog’s paws clean isn’t just about maintaining a spotless house. Regular paw cleaning protects your pet’s health, prevents infections, and strengthens the bond between you and your canine companion. This comprehensive guide walks you through everything you need to know about proper paw hygiene for dogs.
Why Clean Dog Paws Matter More Than You Think
Your dog’s paws work overtime every single day. They walk on various surfaces, from hot pavement to muddy trails, collecting bacteria, allergens, and debris along the way. These contaminations can lead to serious health issues if left untreated.
Dirty paws harbor harmful bacteria that cause infections between toes and around nail beds. Dogs naturally lick their paws to groom themselves, ingesting these bacteria and potentially developing stomach problems. Regular cleaning eliminates these health risks before they become serious concerns.
Salt from winter sidewalks burns sensitive paw pads, causing painful cracks and irritation. Chemical lawn treatments stick to fur between toes, creating allergic reactions and skin inflammation. Hot summer pavement damages paw pads, leading to burns and blisters that require veterinary attention.
Clean paws also mean a cleaner home environment. Your family breathes easier when fewer allergens and dirt particles circulate through your living space. Children playing on floors stay healthier when paws receive regular cleaning attention.
Essential Supplies for Paw Cleaning Success
Before starting any paw cleaning routine, gather the right supplies. Having everything within reach makes the process smoother for both you and your dog.
Basic cleaning supplies include:
- Lukewarm water in a shallow basin
- Mild dog shampoo or specialized paw cleanser
- Clean towels (at least three)
- Cotton balls or soft cloth
- Dog nail clippers
- Paw balm or moisturizer
- Treats for positive reinforcement
Advanced cleaning tools:
- Paw cleaning cups with silicone bristles
- Portable paw washers for outdoor use
- Antiseptic wipes designed for pets
- Blow dryer on cool setting
- Non-slip mat for bathtub safety
Quality supplies make a significant difference in cleaning effectiveness. Invest in products specifically formulated for dogs, as human products contain ingredients that irritate sensitive paw skin.
Step-by-Step Paw Cleaning Process
Successful paw cleaning requires patience, gentleness, and the right technique. Rush through the process, and you’ll stress your dog while missing important cleaning areas.
Step 1: Prepare Your Dog Start by calming your pet with gentle voice tones and reassuring touches. Have treats ready to reward good behavior throughout the cleaning session. Choose a quiet location free from distractions where your dog feels comfortable.
Step 2: Initial Inspection Examine each paw carefully before cleaning begins. Look for cuts, thorns, stones, or swelling between toes. Check for overgrown nails that need trimming. Note any unusual odors that might indicate infection.
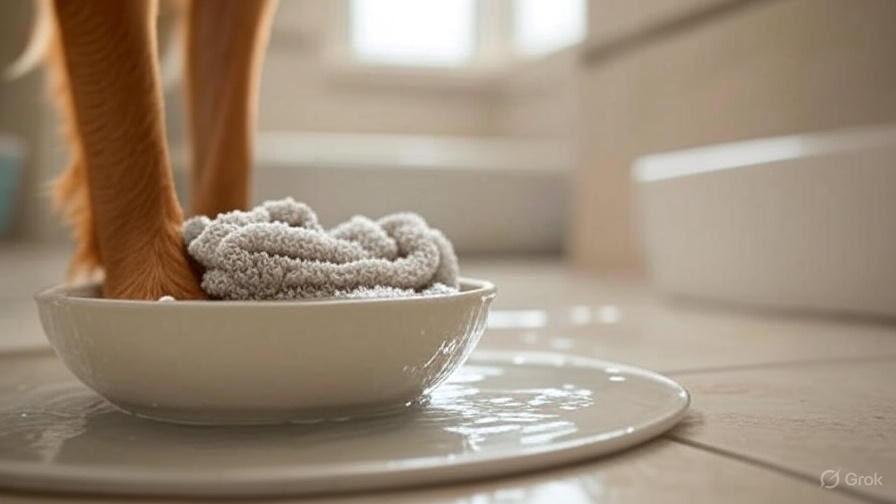
Step 3: Rinse Away Surface Dirt Hold your dog’s paw gently but firmly in one hand. Use lukewarm water to rinse away loose dirt and debris. Start from the top of the paw and work downward, ensuring water reaches between all toes.
Step 4: Apply Cleaning Solution Massage a small amount of dog-safe cleanser into the paw pad and between toes. Work the cleanser into a light lather, paying special attention to areas where dirt accumulates. Spend extra time on heavily soiled spots.
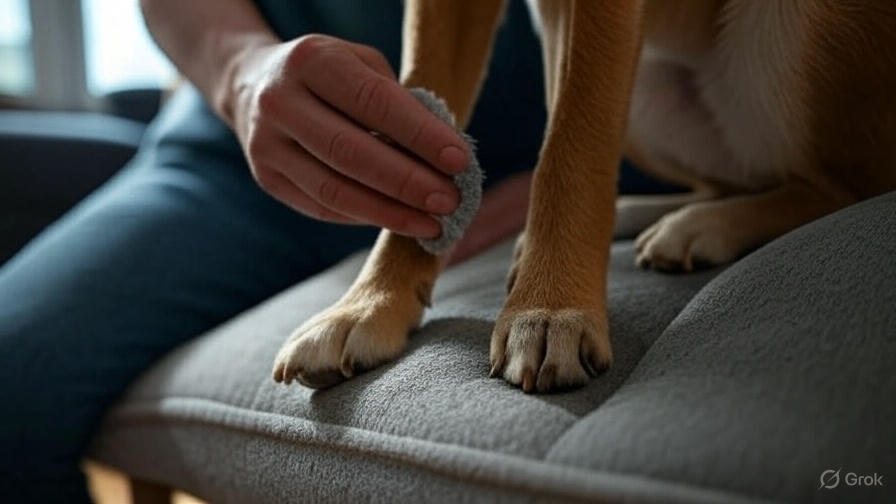
Step 5: Deep Clean Between Toes Use a soft cloth or cotton ball to clean between each toe thoroughly. This area traps the most debris and bacteria, requiring careful attention. Be gentle but thorough in your cleaning motions.
Step 6: Rinse Completely Remove all cleaning product residue with clean lukewarm water. Soap left on paws causes irritation and attracts more dirt. Rinse until water runs clear from the paw.
Step 7: Dry Thoroughly Pat the paw dry with a clean towel, ensuring no moisture remains between toes. Trapped moisture creates perfect conditions for bacterial and fungal growth. Pay attention to the areas between paw pads where water likes to hide.
Step 8: Final Inspection and Treatment Check the cleaned paw for any missed debris or concerning areas. Apply paw balm if pads appear dry or cracked. Trim nails if needed, being careful not to cut into the quick.
Quick Cleaning Methods for Busy Days
Not every day allows time for thorough paw cleaning sessions. These quick methods keep paws reasonably clean when time is limited.
The Towel Method Keep a damp towel by your door for quick paw wipes after short walks. This method removes surface dirt and prevents major messes from entering your home. Replace the towel daily to prevent bacteria buildup.
Paw Cleaning Wipes Commercial pet wipes offer convenient cleaning for minor dirt and debris. Choose wipes with natural ingredients that won’t irritate sensitive skin. Always check between toes, not just paw pads.
Portable Paw Washer These cup-like devices contain silicone bristles that clean paws when you add water and move the paw up and down. They work well for muddy walks but don’t replace thorough cleaning sessions.
Quick Rinse Station Set up a permanent outdoor rinse station near your door. A simple hose attachment or bucket of water allows quick cleaning before entering the house. This method works best in warmer weather.
Dealing with Different Types of Dirt and Debris
Various outdoor conditions require different cleaning approaches. Understanding what your dog encountered helps you choose the most effective cleaning method.
Mud and Clay Allow thick mud to dry slightly before cleaning, making removal easier. Scrape off excess dried mud with your fingers or a soft brush. Rinse with lukewarm water, working from the outside of the paw inward to prevent pushing mud deeper between toes.
Sand and Small Stones Rinse thoroughly with water to remove sand particles that can cause irritation. Check carefully between toes for stuck stones or pebbles. Use tweezers to remove embedded debris, being careful not to push items deeper.
Snow and Ice Remove ice balls stuck to paw fur with lukewarm water. Never use hot water, as the temperature contrast can damage skin. Check for salt or chemical burns from sidewalk treatments. Apply paw balm after cleaning to prevent cracking.
Grass Stains and Plant Matter Green stains from grass often require mild soap to remove completely. Soak stained areas for a few minutes before gentle scrubbing. Remove burrs, seeds, and plant debris caught in paw fur with careful finger manipulation.
Chemical Contamination If your dog steps in unknown chemicals, rinse immediately with large amounts of cool water. Don’t use soap initially, as it can drive chemicals deeper into skin. Contact your veterinarian for guidance on chemical exposure treatment.
Creating a Positive Paw Cleaning Experience
Many dogs resist paw handling, making cleaning sessions stressful for everyone involved. Transform these sessions into positive experiences with patience and proper technique.
Start Early Begin handling puppy paws from a young age, even when cleaning isn’t necessary. This early exposure creates positive associations with paw touching. Reward calm behavior with treats and praise.
Use Positive Reinforcement Always have high-value treats available during cleaning sessions. Reward your dog for allowing paw handling, staying calm, and cooperating with the process. Never punish resistance, as this creates negative associations.
Go Slowly Rush through paw cleaning, and your dog becomes anxious and uncooperative. Take breaks if your pet becomes stressed. Multiple short sessions work better than one long, stressful encounter.
Make it Routine Dogs thrive on routine and predictability. Clean paws at the same time each day, using the same location and supplies. Consistency reduces anxiety and makes the process automatic for both of you.
Stay Calm Yourself Dogs pick up on human emotions instantly. If you’re frustrated or stressed, your dog becomes the same. Maintain a calm, patient demeanor throughout the cleaning process.
Signs Your Dog’s Paws Need Professional Attention
While regular home cleaning handles most paw care needs, certain conditions require veterinary intervention. Recognize these warning signs early to prevent serious complications.
Persistent Odor Strong, unpleasant smells coming from paws indicate bacterial or fungal infections. These infections require prescription treatments that only veterinarians can provide.
Excessive Licking or Chewing Dogs naturally groom their paws, but excessive attention suggests underlying problems. Allergies, infections, or injuries cause dogs to lick and chew paws constantly.
Swelling or Redness Inflamed paw tissues indicate infection, allergic reactions, or injuries requiring medical attention. Don’t ignore persistent swelling that doesn’t respond to gentle cleaning.
Limping or Favoring One Paw Pain causes dogs to avoid putting weight on affected paws. Cuts, thorns, fractures, or infections create painful conditions needing professional evaluation.
Discharge or Bleeding Any discharge from paws, especially with blood or pus, requires immediate veterinary care. These symptoms indicate serious infections or injuries.
Preventing Future Paw Problems
Proactive care prevents most paw problems before they develop into serious conditions. Simple preventive measures save time, money, and discomfort for your dog.
Regular Nail Trimming Overgrown nails force dogs to walk incorrectly, stressing paw joints and muscles. Trim nails every 2-4 weeks, depending on your dog’s activity level and nail growth rate.
Paw Pad Moisturizing Dry, cracked paw pads invite bacteria and cause painful walking. Apply dog-safe paw balm weekly, or more frequently in extreme weather conditions.
Protective Gear Dog booties protect paws from extreme temperatures, rough terrain, and chemical treatments. Introduce booties gradually, rewarding your dog for wearing them.
Environmental Awareness Know what surfaces and substances your dog encounters during walks. Avoid areas treated with chemicals, check pavement temperature before walks, and steer clear of sharp debris.
Diet and Supplements Proper nutrition supports healthy skin and paw pads. Omega-3 fatty acid supplements promote skin health and reduce inflammation. Consult your veterinarian about nutritional support for paw health.
Conclusion
Clean dog paws protect your pet’s health while maintaining a cleaner home environment. Regular cleaning sessions strengthen your bond with your canine companion while preventing serious health problems from developing.
Start your paw cleaning routine today using the techniques outlined in this guide. Your dog’s paws carry them through life’s adventures – they deserve the best care you can provide. With patience, proper supplies, and consistent routine, paw cleaning becomes a simple part of responsible pet ownership.
Remember that every dog is different. Some adapt quickly to paw handling, while others need weeks of gradual conditioning. Stay patient, remain consistent, and celebrate small victories along the way. Your dedication to paw health pays dividends in your dog’s comfort, health, and happiness for years to come.