How to Make a Cat Bed Out of a Blanket?
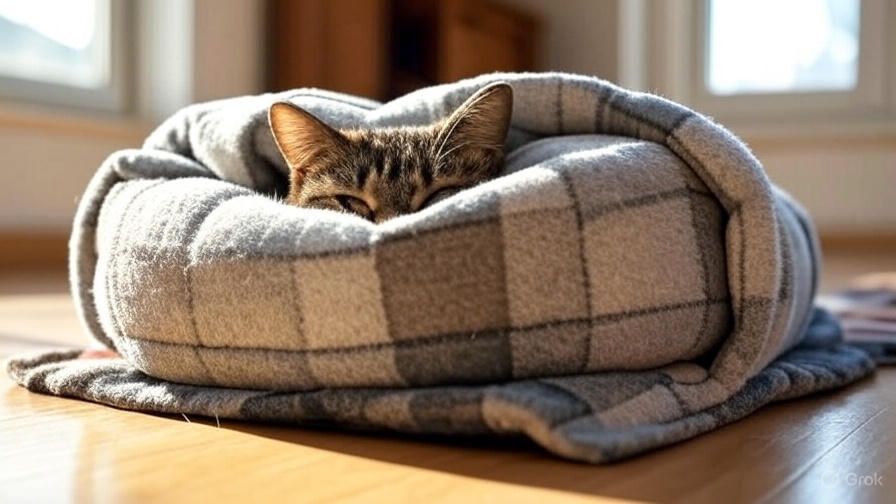
Cats spend 12-16 hours sleeping each day, so they deserve a cozy spot to rest. Making a homemade cat bed from a blanket costs less than buying expensive pet beds while giving your feline friend maximum comfort. This simple DIY project takes just 30 minutes and uses materials you already have at home.
Your cat will love having a personalized sleeping space that smells like home. Best of all, you can customize the size, shape, and softness to match your pet’s preferences perfectly.
Why Choose DIY Cat Beds Over Store-Bought Options
Store-bought cat beds often cost $30-100 but may not suit your cat’s specific needs. Some cats prefer elevated sleeping spots, while others want ground-level hideaways. Many commercial beds use synthetic materials that don’t breathe well or collect odors quickly.
Creating your own cat bed solves these problems instantly. You control every aspect of the design, from fabric choice to final dimensions. Old blankets work perfectly for this project since they already carry familiar scents your cat associates with comfort and safety.
Handmade beds also let you repurpose household items instead of throwing them away. That worn blanket taking up closet space becomes your cat’s new favorite napping spot. You save money while reducing waste and making your pet happy.
Essential Materials for Your Blanket Cat Bed Project
Gathering the right supplies ensures your DIY cat bed turns out perfectly. You need one medium to large blanket as your primary material. Fleece blankets work exceptionally well because they’re soft, warm, and machine washable. Cotton blankets also make excellent choices for cats who prefer cooler sleeping surfaces.
Next, collect basic sewing supplies including scissors, measuring tape, pins, and thread. You can hand-sew the entire project or use a sewing machine for faster results. Thread color should match your blanket for a professional appearance.
Stuffing material gives your cat bed proper cushioning and support. Polyester fiberfill stuffing from craft stores works perfectly and costs just a few dollars. You can also repurpose stuffing from old pillows or cushions you no longer need.
Optional materials include fabric markers for marking cut lines and a seam ripper for fixing mistakes. Having these tools nearby makes the process smoother, though they’re not absolutely necessary for success.
Step-by-Step Instructions for Basic Blanket Cat Bed
Start by washing and drying your blanket to remove any dust or odors. Clean materials make the sewing process easier and ensure your finished bed stays fresh longer. Iron the blanket if it’s wrinkled to create smooth working surfaces.
Fold your blanket in half lengthwise, then measure and mark a rectangle that’s roughly 24 inches by 18 inches. This size works well for most adult cats, but adjust dimensions based on your pet’s size. Large cats need beds around 30 inches long, while kittens do fine with 18-inch beds.
Cut along your marked lines to create two identical rectangles. These pieces become the top and bottom of your cat bed. Save any leftover fabric for making matching toys or smaller beds for multiple cats.
Place the rectangles together with the softer sides facing inward. This technique ensures the finished bed has the plush texture on the outside where your cat will rest. Pin the edges together every few inches to prevent shifting while you sew.
Sew around three and a half sides of the rectangle, leaving a 6-inch opening on one short side. Use a straight stitch about half an inch from the edge for strong seams that won’t split when your cat kneads the bed. Remove pins as you sew to avoid damaging your machine or needle.
Turn the pillowcase inside out through the opening you left. The soft sides now face outward, creating the proper texture for your cat’s comfort. Use a blunt object like a pencil eraser to push out the corners for crisp edges.
Stuff the bed with polyester fiberfill until it feels comfortably firm but not rock-hard. Cats like beds that give slightly when they lie down but still provide good support. Test the firmness by pressing down with your hand – it should compress about an inch before bouncing back.
Hand-stitch the opening closed using small, tight stitches that match your machine sewing. Double-knot the thread ends and trim excess for a clean finish. Your basic blanket cat bed is now ready for testing.
Advanced Techniques: Creating a Bolster-Style Cat Bed
Bolster beds feature raised edges that many cats find irresistibly cozy. These elevated borders help cats feel secure while providing a convenient headrest for deep sleep sessions. Making a bolster bed requires slightly more advanced techniques but produces professional-looking results.
Begin with a rectangular piece of blanket measuring 30 inches by 24 inches for the base. Cut two additional strips measuring 30 inches by 8 inches and two strips measuring 24 inches by 8 inches. These four strips become your bolster sides.
Sew the short ends of your strips together to form one continuous loop. This loop will wrap around the perimeter of your base rectangle to create raised edges. Make sure your seams are strong since cats often lean against bolster sides.
Attach the bolster loop to your base rectangle by pinning the bottom edge of the loop to the perimeter of the base. Sew carefully around all four sides, maintaining consistent seam allowances for even bolster height.
Create a removable cover for easy washing by leaving one side of the bolster partially unsewn. Install a zipper or use Velcro strips to make a closure system. This feature makes maintenance much simpler when your bed needs cleaning.
Stuff both the base and bolster sections with appropriate amounts of fiberfill. The base should be firm enough to support your cat’s full weight, while bolster sides can be slightly softer for comfortable leaning. Test different stuffing levels until you find the perfect balance.
No-Sew Alternatives for Quick Cat Bed Solutions
Not everyone owns a sewing machine or feels comfortable with needle and thread. Several no-sew methods create comfortable cat beds using just blankets and basic household items. These techniques work perfectly for renters who can’t make noise with sewing machines or people who need beds immediately.
The simplest no-sew option involves folding a large blanket into layers until it reaches your desired thickness. Secure the layers with safety pins placed every 6 inches around the perimeter. This method takes just 5 minutes but creates a perfectly functional sleeping surface.
Fabric glue provides another sewing-free solution for permanent cat beds. Apply fabric glue along the edges of two blanket pieces, then press them together firmly. Allow 24 hours for complete drying before letting your cat use the bed. This technique works best with cotton or fleece blankets.
Large pillowcases make instant cat bed covers when stuffed with blankets or towels. Simply fold your blanket to fit inside the pillowcase, then tie the open end with a decorative ribbon. This approach lets you change covers easily for washing or seasonal decoration.
Braided blanket beds offer a unique no-sew alternative that cats absolutely love. Cut your blanket into three long strips, then braid them together loosely. Form the braid into a circle and secure the ends with strong fabric glue or safety pins. The resulting ring creates a cozy nest perfect for curled-up sleeping.
Sizing Your Cat Bed for Different Breeds and Ages
Cat size varies dramatically between breeds and life stages. Maine Coons and Ragdolls need significantly larger beds than Siamese or Devon Rex cats. Age also affects sizing needs since senior cats often prefer more spacious beds for arthritic joints, while kittens feel secure in smaller spaces.
Measure your cat from nose to tail base for length requirements. Add 6-8 inches to this measurement for comfortable stretching room. Width should accommodate your cat lying on their side with legs extended, plus an extra 4 inches for movement.
Small cats weighing 5-8 pounds do well with beds measuring 18×15 inches. Medium cats in the 9-12 pound range prefer beds around 22×18 inches. Large cats over 13 pounds need beds at least 26×20 inches for proper comfort.
Consider your cat’s sleeping style when determining final dimensions. Cats who sleep curled in tight balls can use smaller beds, while sprawlers need extra length and width. Watch your cat’s current sleeping habits for clues about their space preferences.
Kittens under 6 months old should have appropriately scaled beds that won’t overwhelm them. A bed that’s too large can make young cats feel insecure and less likely to use it regularly. Start with smaller dimensions and upgrade as your kitten grows.
Senior cats benefit from slightly larger beds with extra cushioning for joint support. Consider making beds with lower sides for easier entry and exit, especially for cats with mobility issues or arthritis pain.
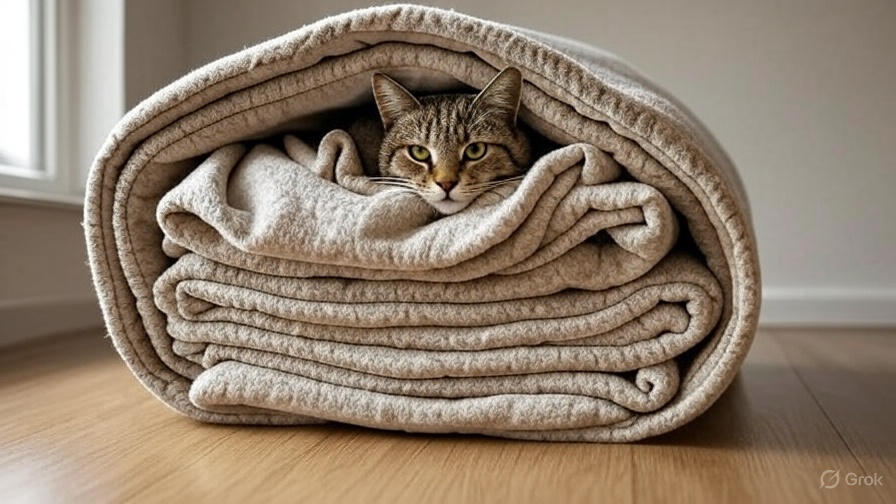
Fabric Selection: Best Blanket Types for Cat Comfort
Fabric choice directly impacts your cat’s comfort and your bed’s durability. Cats have sensitive skin and specific texture preferences that influence which materials work best for sleeping surfaces. Some fabrics also resist pet hair and odors better than others.
Fleece ranks as the top choice for cat beds because of its soft texture and excellent insulation properties. This synthetic material washes easily, dries quickly, and maintains its shape after repeated use. Fleece also resists static buildup that can make your cat’s fur stand up uncomfortably.
Cotton blankets offer breathability that many cats prefer, especially in warmer climates. Natural cotton fibers allow air circulation while still providing adequate warmth for comfortable sleep. Cotton also absorbs and releases moisture naturally, preventing that stuffy feeling some synthetic materials create.
Wool blankets provide superior warmth but require more careful maintenance. Many cats love wool’s natural texture, but this material needs gentle washing and proper drying to prevent shrinkage. Only choose wool if you’re committed to following care instructions carefully.
Avoid blankets with loose weaves or decorative elements like fringe or tassels. Cats may catch their claws in loose threads, potentially causing injury or damaging the bed. Smooth, tightly woven fabrics work best for both safety and longevity.
Microfiber blankets resist pet hair and clean easily but may feel too slippery for some cats. Test your cat’s reaction to different textures before committing to a full bed project. Some cats love ultra-smooth surfaces while others prefer more grip.
Washing and Maintenance Tips for Homemade Cat Beds
Proper care extends your DIY cat bed’s lifespan while keeping it fresh and hygienic for your pet. Cats are naturally clean animals who appreciate beds that smell and feel fresh. Regular maintenance also prevents the buildup of allergens and bacteria that could affect your cat’s health.
Vacuum your cat bed weekly to remove loose hair, dander, and debris. Use your vacuum’s upholstery attachment for best results, working in different directions to lift embedded particles. This simple step prevents deep-set odors and keeps the bed looking new longer.
Wash removable covers every two weeks or when they begin to smell. Use pet-safe detergent and avoid fabric softeners that can irritate sensitive cat skin. Wash in cool water to prevent shrinkage and maintain fabric integrity over time.
For beds without removable covers, spot-clean stains immediately with pet-safe cleaners. Blot rather than rubbing to avoid spreading stains deeper into the fabric. Allow treated areas to air dry completely before letting your cat use the bed again.
Deep clean the entire bed monthly by hand washing in a large sink or bathtub. Use gentle soap and lukewarm water, squeezing rather than wringing to remove excess moisture. Rinse thoroughly to remove all soap residue that might irritate your cat’s skin.
Air dry your cat bed completely before use to prevent mold and mildew growth. Place beds in well-ventilated areas away from direct sunlight that might fade colors. Proper drying typically takes 12-24 hours depending on thickness and humidity levels.
Replace stuffing every 6-12 months as it compresses and loses support. Fresh stuffing keeps the bed comfortable and maintains proper shape for your cat’s spine alignment during sleep.
Creative Variations and Customization Ideas
Once you master basic cat bed construction, experiment with creative variations that reflect your home’s style and your cat’s personality. Custom touches make beds more appealing to both cats and their human families while showcasing your crafting skills.
Create themed beds that match your home décor by choosing blankets in complementary colors and patterns. Nautical themes work well with blue and white striped blankets, while rustic homes suit earth-tone plaids or solid browns and greens.
Add pockets to your cat bed design for storing toys or treats. Small fabric pouches sewn to the sides create convenient storage while encouraging play near the sleeping area. This feature works especially well for cats who like having favorite toys nearby during naps.
Incorporate heating elements for cats who love extra warmth. Sew a pocket into your bed design that holds a removable heating pad designed for pets. This addition provides therapeutic benefits for senior cats with arthritis or circulation issues.
Design multi-level beds for households with multiple cats by creating stacked or side-by-side sleeping areas. This approach prevents territorial disputes while giving each cat their own defined space within a shared structure.
Experiment with different shapes beyond basic rectangles. Round beds work well for cats who sleep curled up, while oval designs suit cats who prefer stretching out partially. Heart shapes add whimsical touches for Valentine’s Day or special occasions.
Add removable toys or dangling elements that encourage play near the bed. Cats often enjoy batting at hanging objects before settling down for naps. Just ensure all additions are securely attached and safe for unsupervised use.
Troubleshooting Common DIY Cat Bed Problems
Even experienced crafters encounter challenges when making homemade cat beds. Learning to identify and solve common problems saves time and prevents frustration during your project. Most issues have simple solutions that don’t require starting over completely.
Uneven stuffing creates lumpy beds that cats find uncomfortable. Fix this problem by removing some stuffing and redistributing it more evenly throughout the bed. Work the filling with your hands to break up clumps and create consistent density.
Loose seams happen when thread tension is incorrect or stitches are too far apart. Reinforce weak areas by sewing over them again with smaller stitches. Use stronger thread for beds that will see heavy use from large cats or multiple pets.
Beds that are too firm indicate overstuffing, which prevents proper comfort and support. Remove some filling until the bed compresses slightly when pressed. The ideal firmness allows about one inch of compression under gentle pressure.
Cats who refuse to use new beds may be responding to unfamiliar scents or textures. Place the bed in your cat’s favorite sleeping spot and rub it with a cloth that has their scent. You can also sprinkle a small amount of catnip on the bed to increase initial interest.
Sliding beds frustrate cats and may prevent regular use. Add non-slip material to the bottom of your bed or place it on a textured surface that provides grip. Rubber shelf liner works well for this purpose and costs very little.
Fading colors result from washing in hot water or excessive sun exposure. Always wash cat beds in cool water and dry them away from direct sunlight. Pre-treat your blanket with color-safe products if fading is a major concern.
Safety Considerations for DIY Cat Beds
Pet safety should guide every decision in your cat bed construction process. Cats are curious creatures who may chew, scratch, or investigate their beds in ways that could create hazards. Taking proper precautions protects your pet while ensuring long-lasting results.
Check all materials for small parts that could pose choking hazards. Remove buttons, zippers, or decorative elements that cats might swallow. Even large buttons can become dangerous if they work loose over time through normal use and washing.
Use only pet-safe thread and avoid treatments or chemicals that could harm your cat. Some flame-retardant treatments on fabrics can cause skin irritation or illness if ingested. When in doubt, choose untreated natural materials over chemically processed alternatives.
Secure all seams properly to prevent stuffing from escaping and creating ingestion risks. Double-stitch stress points where your cat’s weight and movement put extra pressure on the fabric. Pay special attention to corners and edges where seams typically fail first.
Test all fastenings regularly for signs of wear or loosening. Replace worn closures before they become hazardous, and inspect beds weekly for damage that needs immediate attention. Prevention is always easier than dealing with emergency veterinary visits.
Avoid using materials with long fibers or loops that could tangle around your cat’s legs or neck. Berber-style carpets and some fuzzy blankets pose entanglement risks, especially for active cats who knead vigorously before settling down.
Position finished beds away from potential hazards like electrical cords, heating vents, or unstable furniture. Even the safest bed becomes dangerous if placed in a risky location where accidents could occur.
Cost Analysis: DIY vs Store-Bought Cat Beds
Understanding the financial benefits of making your own cat beds helps justify the time investment and motivates you to start crafting. The cost difference between homemade and commercial beds is often dramatic, especially for high-quality options that match your DIY results.
Basic commercial cat beds from pet stores typically cost $25-50 for decent quality. Premium beds with orthopedic features or designer styling can easily reach $75-150. These prices add up quickly in multi-cat households where several beds are needed.
DIY cat beds using new materials cost approximately $8-15 to make, depending on blanket quality and size. Using blankets you already own reduces costs to just $2-5 for stuffing and thread. This represents savings of 60-90% compared to store-bought alternatives.
Consider the customization value when calculating total benefits. Commercial beds come in limited sizes and styles that may not suit your cat’s specific needs. Custom beds provide perfect fit and personalized features that would cost hundreds of dollars if available commercially.
Factor in durability when comparing long-term costs. Well-made DIY beds often outlast cheaper commercial options, providing better value over time. You can also repair homemade beds easily, while damaged store-bought beds typically require complete replacement.
Multiple bed scenarios show even greater savings potential. Making three beds for a multi-cat household costs about $25-40 total, while buying equivalent commercial beds could cost $150-300. These savings fund other important pet care expenses.
Time investment averages 2-4 hours per bed depending on complexity and skill level. Even at minimum wage rates, your time cost plus materials still provides significant savings compared to premium commercial beds.
Your cat deserves a comfortable sleeping space that fits their unique needs and your budget constraints. Making a cat bed from a blanket combines practicality with creativity while providing your pet with a cozy retreat they’ll use for years. This simple project delivers professional results without requiring advanced skills or expensive tools.
Start with basic rectangular designs to build confidence, then explore advanced techniques like bolster sides or custom shapes. Remember that your cat’s comfort comes first, so focus on proper sizing, safe materials, and adequate cushioning for the best results.
The satisfaction of watching your cat enjoy a bed you made personally makes every minute of effort worthwhile. Your handmade creation will become a beloved part of your pet’s daily routine while showcasing your caring dedication to their wellbeing.

