
How to Sync PetSafe Collar to Transmitter?
Pet containment systems help keep your furry friends safe while giving them freedom to roam your yard. PetSafe wireless fence systems rely on proper synchronization between the collar receiver and base transmitter to work effectively. Many pet owners struggle with this crucial setup process, but the right approach makes collar syncing straightforward and reliable.
This comprehensive guide walks you through every step needed to sync your PetSafe collar with its transmitter. You’ll learn troubleshooting techniques, maintenance tips, and expert advice to ensure your pet containment system functions perfectly.
Getting Started with Your PetSafe System Components
Before diving into the syncing process, you need to identify your specific PetSafe model and gather all necessary components. Different PetSafe wireless fence models use varying sync procedures, so knowing your exact system prevents confusion during setup.
Check your product manual or the model number printed on your transmitter base. Common PetSafe wireless fence models include the Stay & Play, Instant Fence, and various numbered series like PIF-300 or RFA-67. Each model has specific collar compatibility requirements and unique syncing steps.
Your basic kit should include the main transmitter unit, collar receiver, boundary flags, power adapter, and instruction manual. Some newer models also include test light tools that help verify proper collar function during the syncing process.
The transmitter serves as your system’s control center, creating the invisible boundary signal that communicates with your pet’s collar. This base unit must stay plugged into a power source and positioned centrally in your home for optimal signal coverage.
Collar receivers detect the boundary signal and deliver corrections when your pet approaches the established perimeter. These devices contain rechargeable batteries, correction level controls, and indicator lights that show sync status and battery life.
Preparing Your Equipment for Successful Syncing
Proper preparation prevents most syncing problems before they start. Begin by ensuring your transmitter has been plugged in for at least 24 hours before attempting collar synchronization. This waiting period allows the system to stabilize and establish consistent boundary signals.
Charge your collar receiver fully using the provided charging cable. Most PetSafe collars require 2-3 hours for complete charging, and attempting to sync with low battery often results in failed connections or unreliable performance.
Clear the area around your transmitter of electronic devices that might cause interference. WiFi routers, cell phones, metal appliances, and other wireless devices can disrupt the syncing process. Move these items at least 10 feet away from your transmitter during setup.
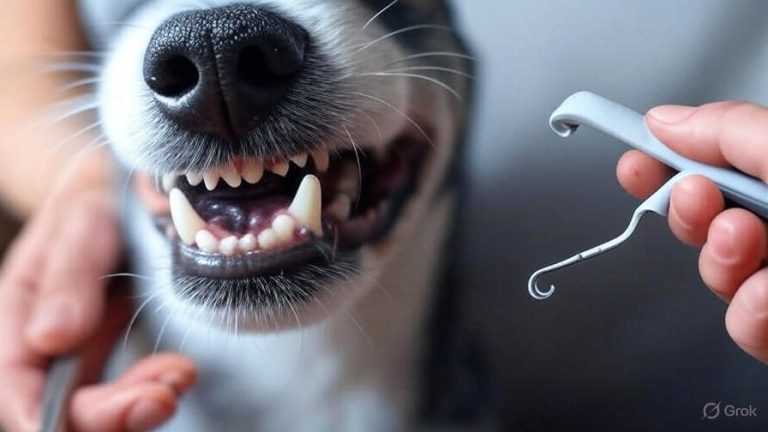
Test your collar’s basic functions before starting the sync process. Press and hold the collar’s power button to turn it on, then verify that indicator lights activate properly. A functioning collar typically shows solid green lights when powered on and properly charged.
Position yourself within 5 feet of the transmitter during syncing attempts. The collar must detect strong, consistent signals from the base unit to establish proper communication. Distance and obstacles between components often cause sync failures.
Step-by-Step Collar Synchronization Process
The actual syncing process varies slightly between PetSafe models, but most systems follow similar general steps. Start by locating the sync button on your transmitter base. This button is usually small and may require a paperclip or similar tool to press properly.
Turn on your collar receiver and verify it shows ready status through its indicator lights. Most collars display flashing lights when powered on but not synced to a transmitter. Some models beep or vibrate to indicate they’re searching for a signal.
Hold the collar receiver within 3 feet of the transmitter base. Press and hold the transmitter’s sync button for approximately 5 seconds until you hear a beep or see a flashing light on the base unit. This action puts the transmitter into pairing mode.
Immediately after activating the transmitter’s sync mode, press and hold the collar’s sync button. The collar sync button location varies by model but is typically found near the charging port or under a rubber cover. Hold this button for 10-15 seconds or until you observe status light changes.
Watch for confirmation signals that indicate successful syncing. Most PetSafe systems provide visual and audible feedback when collar and transmitter establish communication. Common success indicators include solid green lights on both devices, specific beep patterns, or LED sequences described in your manual.
Test the newly synced connection by walking the collar toward your established boundary. The collar should beep or vibrate as it approaches the perimeter, then deliver correction stimulation if you continue past the warning zone. This test confirms that sync was successful and your system is functioning properly.
Troubleshooting Common Syncing Problems
Sync failures happen for various reasons, but most issues stem from simple oversights or environmental factors. When your collar won’t sync with the transmitter, start by checking battery levels in both devices. Low power prevents reliable communication between components.
Interference from other electronic devices ranks as another common sync problem. Turn off nearby WiFi networks, unplug household electronics, and move metal objects away from your transmitter. Even LED light bulbs can sometimes interfere with PetSafe system signals.
Distance problems also cause sync failures. Ensure you’re within the recommended range during the syncing process. Some older PetSafe models require you to hold the collar directly against the transmitter base while pressing sync buttons.
Timing issues prevent many successful syncs. The sequence and duration of button presses must match your specific model’s requirements exactly. Review your manual carefully and practice the timing before attempting sync again.
Reset both devices if multiple sync attempts fail. Most PetSafe transmitters have reset procedures that clear previous pairings and restore factory settings. Collar receivers often reset by holding power buttons for extended periods, typically 15-20 seconds.
Environmental factors like weather can affect syncing success. High humidity, extreme temperatures, and atmospheric conditions sometimes interfere with radio frequency signals. Try syncing during different weather conditions if initial attempts fail consistently.
Verifying Successful Collar Synchronization
Confirmation of proper syncing requires systematic testing beyond just observing indicator lights. Walk your synced collar around your established boundary perimeter while monitoring its responses. The collar should provide consistent warning signals at the same distance from your home’s center point.
Test correction levels by continuing past the warning zone with the collar in your hand. Most PetSafe systems deliver progressive corrections, starting with beeps, then vibration, followed by static stimulation. Verify that each correction level functions as expected.
Check signal consistency by testing the collar at various points around your boundary. Signal strength should remain relatively uniform throughout the perimeter, though some variation is normal due to terrain and obstacles.
Battery performance after syncing indicates successful connection quality. A properly synced collar typically maintains charge longer than one with poor transmitter communication. Monitor battery drain patterns in the days following successful synchronization.
Range testing helps verify that your sync created stable communication between devices. Carry the synced collar to different areas of your property and observe whether it maintains proper boundary detection throughout your intended containment area.
Document your sync settings and correction levels for future reference. Record the date of successful sync, correction level used, and any specific steps that worked for your particular model. This information proves valuable when resyncing becomes necessary.
Advanced Sync Techniques for Stubborn Systems
Some PetSafe models require advanced techniques when standard syncing methods fail repeatedly. Power cycling both devices in specific sequences often resolves communication problems that simple resets cannot fix.
Try the “proximity sync” method for particularly difficult collar-transmitter combinations. Place the collar directly on top of the transmitter base, ensuring maximum signal strength during the pairing process. This technique works especially well with older PetSafe models.
Temperature considerations affect sync success more than many owners realize. Cold weather can reduce battery performance and signal strength, making syncing more difficult. Warm both devices to room temperature before attempting problematic syncs.
Multiple collar households require sequential syncing to prevent interference between receivers. Sync one collar at a time, then test each individually before adding additional collars to your system. This approach prevents signal conflicts during the pairing process.
Factory reset procedures clear stubborn connection problems that standard troubleshooting cannot resolve. Consult your manual for model-specific factory reset instructions, as these procedures vary significantly between different PetSafe systems.
Professional-grade sync techniques involve signal strength measurement and frequency analysis. While most homeowners don’t need these advanced methods, persistent problems sometimes require professional installation services that use specialized equipment to diagnose sync issues.
Maintaining Proper Collar-Transmitter Communication
Successful syncing marks just the beginning of proper system maintenance. Regular testing ensures your collar and transmitter maintain reliable communication over time. Schedule monthly walks around your boundary perimeter to verify consistent collar responses.
Battery maintenance directly impacts sync stability. Charge collar receivers according to manufacturer recommendations, typically every 2-3 weeks depending on usage. Low batteries cause communication problems that mimic sync failures.
Transmitter positioning affects long-term sync reliability. Ensure your base unit remains in its optimal location, away from interference sources and positioned to provide even signal coverage throughout your containment area. Moving the transmitter often requires collar resyncing.
Software updates for newer PetSafe models can improve sync reliability and add new features. Check the manufacturer’s website periodically for firmware updates that might enhance your system’s performance.
Environmental monitoring helps predict when resyncing might become necessary. Seasonal changes, new construction in your area, and addition of electronic devices can all affect system performance over time.
Collar wear and tear gradually degrades sync quality. Inspect your collar receiver regularly for damage to antenna components, charging contacts, and housing integrity. Physical damage often requires professional repair or replacement to maintain proper synchronization.
When to Resync Your PetSafe Collar System
Several situations require collar resyncing to maintain optimal performance. Power outages that affect your transmitter often necessitate complete system reinitialization, including new collar syncing procedures.
Moving your transmitter to a new location within your home typically requires resyncing all associated collars. The change in signal patterns and strength distribution affects how collars communicate with the base unit.
Adding new pets to your household means syncing additional collars to your existing transmitter. This process requires careful attention to prevent interference between multiple collar receivers operating on the same system.
Collar replacement due to damage or battery failure always requires syncing the new device to your existing transmitter. Even identical model replacements need proper synchronization to function correctly within your containment system.
Seasonal maintenance routines should include sync verification and resyncing if necessary. Weather changes, vegetation growth, and environmental factors can gradually degrade communication quality over time.
Performance degradation symptoms indicate when resyncing might restore proper function. These symptoms include inconsistent boundary detection, excessive battery drain, delayed collar responses, or intermittent correction delivery.
Professional Installation and Sync Services
Complex properties or persistent sync problems sometimes require professional installation services. Certified PetSafe installers have specialized equipment and experience that resolve difficult synchronization issues efficiently.
Multi-acre properties with challenging terrain benefit from professional site analysis and custom sync procedures. Professional installers can optimize transmitter placement and collar settings for maximum reliability across large containment areas.
Multiple pet households with various collar models often require professional coordination to prevent interference problems. Experienced installers understand how different PetSafe models interact and can configure systems for optimal multi-collar performance.
Warranty considerations make professional installation attractive for expensive PetSafe systems. Many manufacturers offer extended warranties and support for professionally installed systems, providing additional protection for your investment.
Technical support from professional installers includes training on proper sync procedures, maintenance schedules, and troubleshooting techniques. This education helps you maintain your system effectively between professional service visits.
Emergency service availability through professional installers provides peace of mind for pet owners who depend on their containment systems for pet safety. Quick response times ensure minimal disruption when sync problems occur.
Conclusion: Mastering Your PetSafe Collar Sync Process
Successful PetSafe collar synchronization requires attention to detail, proper preparation, and systematic troubleshooting when problems arise. The time invested in learning your specific model’s sync procedures pays dividends in reliable pet containment and peace of mind.
Regular maintenance and testing keep your synced system functioning optimally throughout its service life. By following the techniques and procedures outlined in this guide, you can maintain professional-quality performance from your PetSafe wireless fence system.
Remember that every PetSafe model has unique characteristics and requirements. When in doubt, consult your specific manual or contact customer support for model-specific guidance. Proper synchronization ensures your pet’s safety while providing the freedom they need to enjoy your property safely.