How to Cut Your Dog’s Nails?
Every dog owner faces the challenge of nail trimming at some point. Your furry friend’s nails grow continuously, and regular maintenance keeps them healthy and comfortable. Long nails can cause pain, affect your dog’s gait, and even lead to serious injuries.
This comprehensive guide walks you through everything you need to know about cutting your dog’s nails safely and effectively. You’ll learn the proper techniques, discover the best tools, and gain confidence in this essential grooming task.
Why Regular Nail Trimming Matters for Your Dog
Dogs’ nails serve important functions in their daily lives. Wild canines naturally wear down their nails through running, digging, and climbing. Domestic dogs, however, spend most of their time on soft surfaces like carpet, grass, and bedding. This lifestyle means their nails don’t get the natural wear they need.
Overgrown nails create several problems for your pet. Long nails can curl and grow into the paw pads, causing severe pain and infection. They also change how your dog walks, potentially leading to joint problems and arthritis over time. Sharp nails can scratch furniture, floors, and family members during play.
Regular nail maintenance prevents these issues and keeps your dog comfortable. Most dogs need nail trims every 3-4 weeks, though active dogs who walk frequently on concrete may need less frequent trimming.
Essential Tools for Dog Nail Trimming
The right equipment makes nail trimming safer and more efficient. You’ll need several key items before you begin:
Nail Clippers Dog nail clippers come in three main types. Guillotine clippers work well for small to medium dogs with round nails. Scissor-type clippers handle larger dogs and thicker nails more effectively. Grinder tools offer precise control but require more time and patience.
Styptic Powder This powder stops bleeding quickly if you accidentally cut the quick (the pink area inside the nail). You can find styptic powder at pet stores, or use cornstarch or flour in emergencies.
Treats and Rewards High-value treats help create positive associations with nail trimming. Choose something your dog absolutely loves and save these special treats exclusively for nail care sessions.
Good Lighting Proper lighting helps you see the pink quick inside light-colored nails. A flashlight or bright lamp ensures you can trim safely and accurately.
Towel or Blanket Some dogs feel more secure when wrapped gently in a towel. This technique, called “purrito wrapping,” can calm anxious pets during the process.
Preparing Your Dog for Nail Trimming
Success starts with proper preparation. Begin by examining your dog’s paws regularly when they’re relaxed. Touch their toes, hold their paws, and gently press on their pads. This daily handling helps your dog become comfortable with paw manipulation.
Start nail trimming preparation when your dog is calm and content. After a good walk or play session works well, as tired dogs are typically more cooperative. Avoid attempting nail trims when your dog is excited, anxious, or stressed.
Create a comfortable environment for the procedure. Choose a quiet room with good lighting and minimal distractions. Gather all your supplies beforehand so you won’t need to leave your dog unattended during the process.
Practice holding your dog in the position you’ll use for trimming. Small dogs often do well on a table or in your lap, while larger dogs may be more comfortable standing or lying on the floor. Find what works best for your specific pet.
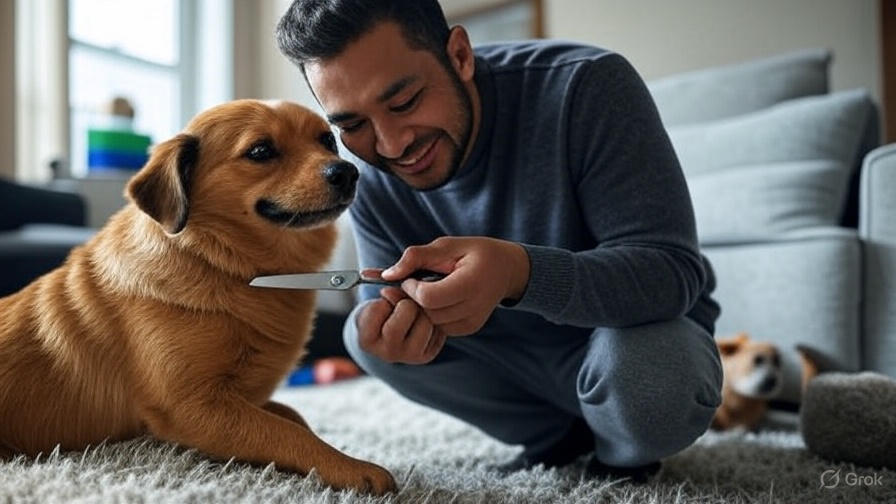
Step-by-Step Nail Trimming Process
Now comes the actual trimming procedure. Follow these steps carefully to ensure a safe and successful experience:
Step 1: Position Your Dog Hold your dog securely but gently. For small dogs, place them on a stable surface at a comfortable height. Large dogs can stand on the floor while you kneel beside them. Ensure your dog feels secure and supported throughout the process.
Step 2: Examine the Nail Hold your dog’s paw firmly but gently. Press on the pad to extend the nail fully. Look for the pink quick inside the nail. In dark nails, the quick is harder to see, so proceed more cautiously.
Step 3: Position the Clippers Place the clippers about 2-3 millimeters away from the quick. Cut at a 45-degree angle, following the natural curve of the nail. This angle provides the cleanest cut and reduces splitting.
Step 4: Make the Cut Apply steady, firm pressure to cut through the nail in one smooth motion. Avoid squeezing slowly or repeatedly, as this can crush the nail and cause pain.
Step 5: Check Your Work Examine the cut surface of the nail. A healthy cut shows a dark outer rim with a lighter center. If you see a small dark circle in the center, you’re approaching the quick and should stop cutting that nail.
Step 6: Reward and Repeat Give your dog a treat and praise after each successful nail. This positive reinforcement helps create good associations with the process. Continue with the remaining nails, taking breaks if your dog becomes stressed.

Dealing with Dark Nails
Black or dark nails present special challenges since you can’t see the quick easily. These nails require extra caution and a different approach.
Start by cutting very small amounts at a time. Make tiny cuts and examine the nail surface after each one. Look for a dark circle in the center of the cut surface, which indicates you’re near the quick.
Use a flashlight to shine light through the nail from underneath. This technique sometimes reveals the quick’s location in dark nails. Take your time and never rush when working with dark nails.
Consider using a nail grinder for dark nails. Grinders allow you to remove small amounts gradually, giving you better control and reducing the risk of cutting the quick.
What to Do If You Cut the Quick
Even experienced groomers occasionally cut the quick. Don’t panic if this happens – it’s a common occurrence that you can handle easily.
Apply styptic powder immediately to the bleeding nail. Press the powder firmly against the cut quick for 30 seconds to stop the bleeding. If you don’t have styptic powder, use cornstarch or flour as alternatives.
Keep your dog calm and still until the bleeding stops completely. Avoid letting them walk on hard surfaces that might reopen the wound. The bleeding should stop within a few minutes.
Watch the affected nail for signs of infection over the next few days. Excessive swelling, discharge, or your dog favoring the paw may indicate complications requiring veterinary attention.
Training Your Dog to Accept Nail Trims
Some dogs naturally resist nail trimming, but patient training can help them learn to tolerate or even enjoy the process. Start this training when your dog is young, but older dogs can also learn with consistency.
Begin by simply touching your dog’s paws daily. Hold each paw for a few seconds, then reward with treats and praise. Gradually increase the time you hold their paws as they become more comfortable.
Introduce the nail clippers gradually. Let your dog sniff and investigate the clippers while receiving treats. Touch the clippers to their nails without cutting, then reward. This desensitization process helps reduce fear and anxiety.
Practice the cutting motion without actually trimming. Position the clippers around the nail and make the squeezing motion, but don’t cut. Reward your dog for staying calm during these practice sessions.
Signs Your Dog Needs a Nail Trim
Regular observation helps you determine when your dog needs nail maintenance. Listen for clicking sounds when your dog walks on hard surfaces. This clicking indicates the nails are touching the ground and need trimming.
Examine your dog’s nails visually. Healthy nails should not curve excessively or touch the ground when your dog stands normally. If you can see the nails clearly when looking at your dog’s feet from the side, they’re likely too long.
Check for signs of discomfort in your dog’s gait. Dogs with overgrown nails may walk differently, favoring certain paws or showing stiffness. Long nails can also get caught in carpets, blankets, or outdoor debris.
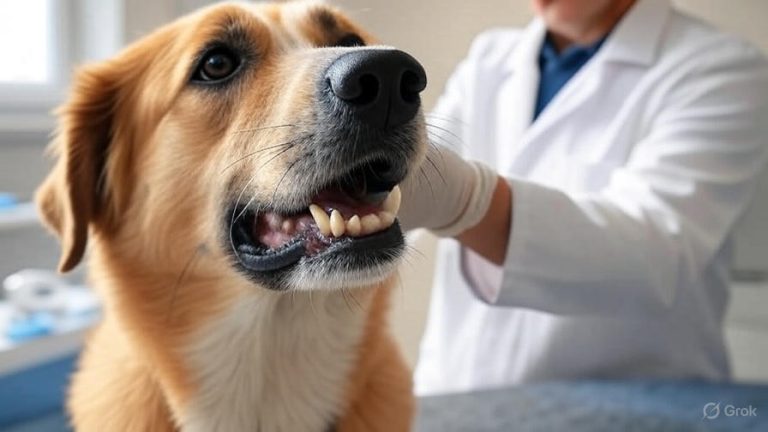
Professional Grooming vs. Home Trimming
Many pet owners wonder whether to trim nails at home or seek professional help. Both options have advantages depending on your situation and your dog’s temperament.
Home trimming offers convenience and cost savings. You can trim nails on your schedule and help your dog become more comfortable with handling. Regular home maintenance also strengthens the bond between you and your pet.
Professional groomers have experience with difficult dogs and proper restraint techniques. They can handle anxious or aggressive dogs more safely than most pet owners. Groomers also have specialized tools and can identify potential nail problems.
Consider your dog’s temperament when making this decision. Calm, well-socialized dogs often do fine with home trimming. Anxious, aggressive, or extremely fearful dogs may need professional handling to ensure everyone’s safety.
Maintaining Healthy Nails Between Trims
Proper nail care extends beyond regular trimming. Daily activities and environmental factors affect nail health and growth rates.
Encourage your dog to walk on various surfaces. Concrete sidewalks, asphalt, and rough terrain naturally help wear down nails. However, don’t rely solely on natural wear, as it’s rarely sufficient for complete nail maintenance.
Provide appropriate scratching surfaces for your dog. Scratching posts designed for dogs, rough mats, or designated digging areas allow natural nail maintenance behaviors.
Monitor your dog’s nutrition, as proper diet supports healthy nail growth. Biotin supplements may help dogs with brittle or weak nails, but consult your veterinarian before adding supplements to your dog’s diet.
Common Mistakes to Avoid
Several common errors can make nail trimming more difficult or dangerous. Avoid these mistakes to ensure successful nail care:
Never cut too much nail at once. Taking small amounts reduces the risk of hitting the quick and makes the process less stressful for your dog. You can always cut more, but you can’t undo a cut that’s too short.
Don’t skip the dewclaws. These “thumb” nails on the inside of your dog’s legs don’t touch the ground and won’t wear naturally. Dewclaws can grow into circular shapes and pierce the pad if ignored.
Avoid using human nail clippers on your dog. These tools aren’t designed for the thickness and shape of dog nails. They can crush or split the nail, causing pain and potential injury.
Don’t attempt nail trims when your dog is stressed or excited. Wait for calm moments when your dog is relaxed and receptive to handling. Forcing the issue often creates negative associations with nail care.
Creating a Positive Nail Care Routine
Establishing a regular routine makes nail trimming easier for both you and your dog. Consistency helps your dog know what to expect and reduces anxiety over time.
Schedule nail trims at the same time and place when possible. This predictability helps your dog prepare mentally for the process. Choose a time when your dog is naturally calm and relaxed.
Keep sessions short, especially when starting. Trim just a few nails at a time if your dog becomes stressed. Multiple short sessions are better than one stressful marathon trimming.
End each session on a positive note. Always conclude with treats, praise, and perhaps a favorite activity. This positive ending helps your dog associate nail care with good experiences.
Conclusion
Cutting your dog’s nails is an essential skill every pet owner should master. With the right tools, proper technique, and patience, you can keep your dog’s nails healthy and comfortable. Regular nail maintenance prevents pain, injury, and behavioral problems associated with overgrown nails.
Remember that practice makes perfect. Your first attempts may be challenging, but both you and your dog will improve with experience. Take your time, stay calm, and focus on creating positive associations with nail care.
If you encounter serious difficulties or your dog shows extreme fear or aggression, don’t hesitate to seek professional help. A veterinarian or professional groomer can provide guidance and ensure your dog receives proper nail care safely.
Start slowly, be patient, and celebrate small victories. Soon, nail trimming will become a routine part of your dog’s grooming care, contributing to their overall health and happiness.