How to Bathe a Kitten?
You just brought home the cutest little ball of fur, and now you’re staring at your kitten covered in who-knows-what. Maybe they got into something sticky. Maybe they have fleas. Or maybe they just smell like a barn. The question hits you: can I even bathe this tiny creature?
The answer is yes, but you need to do it right. Bathing a young cat isn’t like washing a puppy. Kittens get cold fast, they’re small enough to panic in water, and one wrong move can make them hate baths forever. This guide will walk you through everything you need to know about washing your kitten safely.
When Can You Start Bathing Kittens?
Most vets say you can bathe kittens once they hit 8 weeks old. Before that age, their mom handles all the cleaning. Young kittens can’t regulate their body temperature well, so getting them wet before 8 weeks is risky.
That said, sometimes you don’t have a choice. If you find a kitten covered in fleas or caked in dirt, you might need to give them a bath earlier. In these cases, keep the water lukewarm, work fast, and dry them completely.
Healthy kittens over 8 weeks can handle regular baths when needed. Just don’t overdo it. Cats spend hours grooming themselves every day. Too many baths strip away natural oils from their skin and fur.
Essential Supplies for Kitten Bath Time
Get everything ready before you bring your kitten near water. Trust me on this. Once you start, you won’t have time to run around looking for towels.
Here’s what you need:
Kitten-safe shampoo – Human shampoo is a no-go. Our products contain chemicals that irritate cat skin. Buy shampoo made specifically for kittens or young cats. If your kitten has fleas, get a flea shampoo approved for their age and weight.
Two towels minimum – Soft, absorbent towels work best. Have one ready for immediate drying and a backup in case the first one gets soaked.
A small cup or pitcher – You’ll use this to pour water gently over your kitten. A detachable shower head works too if you can control the pressure.
Cotton balls – These protect your kitten’s ears from water. Wet ears can lead to infections.
Non-slip mat – Put this in your sink or tub. Slippery surfaces make scared kittens even more panicked.
Treats – Positive reinforcement helps your kitten associate bath time with good things.
A helper – Having someone to hold the kitten or hand you supplies makes everything easier.
Picking the Right Location
You have three main options: the kitchen sink, bathroom sink, or bathtub. Each has pros and cons.
Kitchen sink – This is my top pick for kittens. The height is comfortable for you, and the small space feels less scary for your kitten. You can fill it with just a few inches of water.
Bathroom sink – Similar benefits to the kitchen sink. Make sure you clear out any soap, razors, or other items first.
Bathtub – This works for larger kittens or if your sinks are too small. The downside is you’ll be bending over, which hurts your back. Use a plastic basin inside the tub to make the space feel smaller and less overwhelming.
Avoid outdoor hoses or cold locations. The water needs to stay warm, and your kitten needs a controlled environment.
Preparing Your Kitten Before the Bath
Don’t just grab your kitten and plunge them into water. That’s how you end up with scratches.
Start by trimming their nails a day or two before bath time. This protects you from accidental scratches when they panic. Use cat nail clippers and only snip the clear tips.
Brush your kitten thoroughly before the bath. Remove any mats or tangles in their fur. Wet mats become impossible to untangle and can pull on their skin.
Let your kitten explore the bathroom or wherever you’ll bathe them. Leave the sink empty at first. Put treats around the area. This helps them feel comfortable in the space before water enters the picture.
Step-by-Step Bathing Process
Now for the actual bath. Stay calm. Your kitten picks up on your stress.
Step 1: Fill the sink with warm water
Fill your sink or basin with 2-3 inches of water. Test the temperature with your elbow or wrist. It should feel slightly warm, never hot. Think baby bath temperature.
Step 2: Place cotton balls in ears
Gently put a cotton ball in each of your kitten’s ears. This stops water from getting into the ear canal.
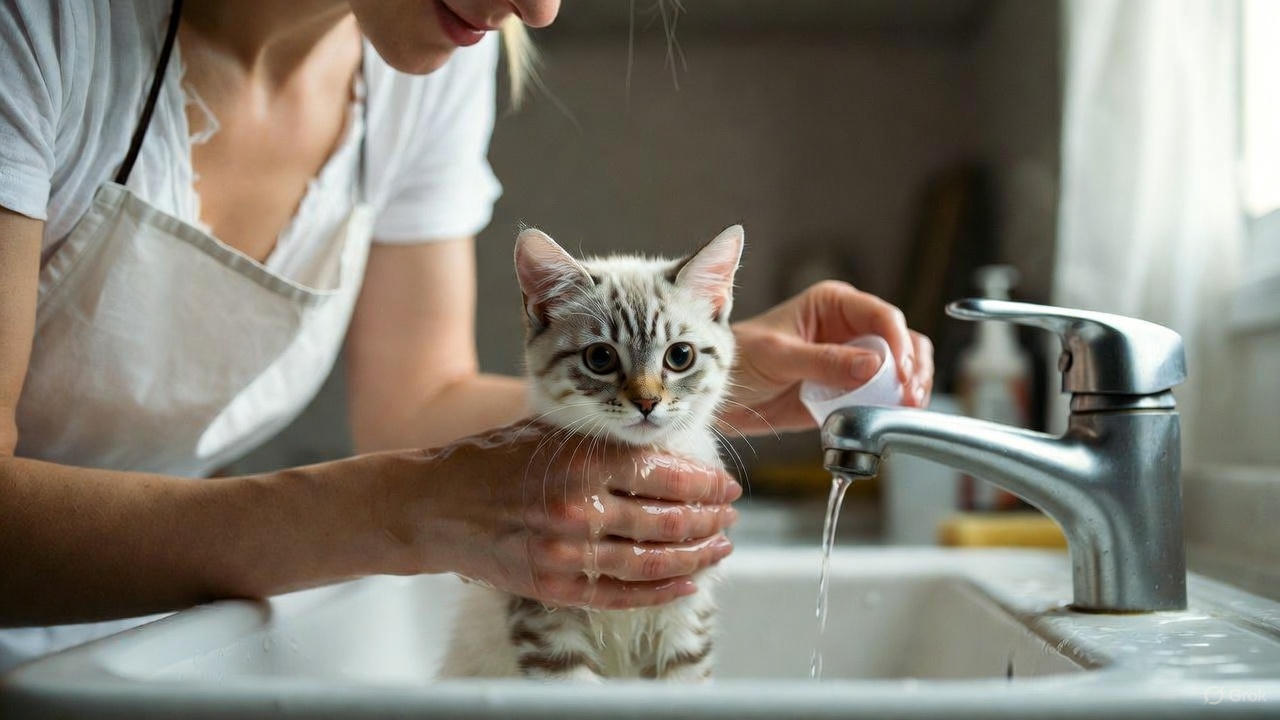
Step 3: Lower your kitten into the water slowly
Hold your kitten firmly but gently. Support their chest and hindquarters. Lower them into the water slowly, back feet first. Talk to them in a calm, soothing voice.
Step 4: Wet their fur gradually
Use your cup to pour water over their body. Start at the neck and work backward. Avoid their face, ears, and eyes. Never pour water directly on their head.
Step 5: Apply shampoo
Put a small amount of kitten shampoo in your hands first. Rub your hands together to create a lather, then massage it into your kitten’s fur. Work from neck to tail. Get their belly, legs, and paws too.
If you’re using flea shampoo, follow the instructions on the bottle. Some need to sit on the fur for several minutes to kill fleas and eggs.
Step 6: Rinse thoroughly
This is the most important step. Leftover shampoo irritates skin and makes fur look dull. Pour clean warm water over your kitten repeatedly until the water runs clear. Keep rinsing even when you think you’re done.
Step 7: Clean the face separately
Never submerge your kitten’s face in water. Instead, use a damp washcloth to gently wipe their face. Be extra careful around their eyes and nose.
Step 8: Lift them out carefully
Support their whole body as you lift them out. Have a towel ready immediately.
Drying Your Kitten Properly
Wet kittens get cold fast. Speed is important here.
Wrap your kitten in a towel right away. Gently press the towel against their fur to absorb water. Don’t rub hard – this tangles their fur and irritates their skin.
Once the first towel is soaked, switch to the dry one. Keep blotting until they’re mostly dry.
You can use a blow dryer on the lowest heat setting if your kitten tolerates it. Hold it far from their skin and keep it moving. Many kittens hate the noise though. If yours freaks out, stick to towel drying.
Keep your kitten in a warm room until they’re completely dry. Don’t let them go outside or into cold areas. Young kittens can develop hypothermia from being wet and cold.
Dealing with a Scared or Aggressive Kitten
Some kittens act like you’re trying to drown them. They hiss, scratch, and try to escape.
If your kitten panics, stop and regroup. Forcing the bath makes future baths even worse.
Try these tactics for nervous kittens:
Desensitization training – Spend a week getting them comfortable with water. Let them watch you run water in the sink. Put them near the sink while you wash dishes. Give treats the whole time.
Start with paw dipping – Just put their feet in shallow water for a few seconds. Reward them with treats. Do this daily until they seem less stressed.
Use a calming spray – Feliway and similar products contain pheromones that help cats feel safe. Spray it in the bathroom 30 minutes before bath time.
Get professional help – If your kitten needs regular baths but fights every time, ask a groomer or vet to show you better techniques. Sometimes having a professional do the first few baths helps.

How Often Should You Bathe Your Kitten?
Most kittens don’t need frequent baths. Their self-grooming keeps them clean.
Bathe your kitten only when:
- They get into something messy or toxic
- They have fleas or other parasites
- They have a medical condition that requires medicated baths
- They can’t groom themselves properly
- They have long fur that gets matted easily
Indoor kittens might go months between baths. Outdoor kittens might need washing more often.
Bathing too often strips the natural oils from cat fur. This leads to dry, flaky skin and a dull coat. Once a month is the maximum for most kittens unless your vet recommends more frequent bathing.
Special Cases and Considerations
Flea baths for kittens
Fleas on young kittens are serious. These parasites can cause anemia in small animals. If your kitten has fleas, act fast.
Use only flea shampoo labeled safe for kittens. Check the minimum age and weight requirements. Many flea products are too strong for kittens under 12 weeks.
The shampoo needs contact time to work. Read the label to see how long to leave it on. Usually it’s 5-10 minutes. Keep your kitten calm and warm during this waiting period.
After rinsing, use a flea comb while their fur is still damp. This removes dead fleas and flea dirt. Comb onto a white paper towel so you can see what you’re catching.
Medicated baths
Some skin conditions require special shampoo prescribed by your vet. Follow their instructions exactly about:
- How long to leave the shampoo on
- How often to bathe
- Water temperature
- Whether to use conditioner after
Don’t skip doses or stop early just because your kitten seems better. Skin conditions often need the full treatment course to clear up completely.
Long-haired kittens
Breeds like Persians and Maine Coons need more grooming help. Their long fur mats easily when wet.
Brush long-haired kittens thoroughly before and after baths. Use a metal comb to work through any tangles gently. Never pull or yank on mats.
You might need leave-in conditioner made for cats. This prevents tangles and makes brushing easier.
Very young or orphaned kittens
If you’re caring for kittens under 4 weeks old, spot cleaning is safer than full baths. Use a warm, damp cloth to clean any dirty areas.
For orphaned kittens without a mother, mimic her grooming by gently wiping them with a soft cloth after feeding. This stimulates them and keeps them clean.
Common Mistakes People Make
Using human products – Your fancy shampoo smells great but contains ingredients toxic to cats. Stick with cat-specific products.
Water too hot or cold – Kittens are sensitive to temperature. Always test the water first.
Skipping the rinse – Shampoo residue causes itchy, irritated skin. Rinse until you’re sure it’s all gone, then rinse one more time.
Bathing too often – You’re not doing your kitten any favors with weekly baths. Their skin needs those natural oils.
Rough handling – Scared kittens squirm. Stay patient and gentle even when they’re making things difficult.
Forgetting to dry properly – Wet kittens get sick easily. Make sure they’re completely dry before letting them roam.
Building Positive Associations with Bath Time
The goal is for your kitten to tolerate baths, or maybe even enjoy them. This takes patience.
Always end on a positive note. Even if the bath was rough, give treats and cuddles afterward. Your kitten should associate bath time with good things eventually.
Keep your tone cheerful. Cats respond to voice tone. If you sound stressed, they feel stressed.
Make the whole experience as quick as possible while still being thorough. Don’t drag it out unnecessarily.
If you can, start bath training young. Kittens who learn baths are safe grow into cats who don’t fight washing.
Alternatives to Full Baths
Sometimes you need to clean your kitten but a full bath isn’t necessary.
Waterless shampoo – These foam or spray products don’t require rinsing. They work well for small dirty spots.
Grooming wipes – Pet-safe wipes clean up minor messes quickly. Keep them handy for dirty paws or muddy bellies.
Dry shampoo for cats – You sprinkle this powder on, massage it through the fur, then brush it out. It absorbs oils and dirt.
Spot cleaning – For isolated dirty areas, just wash that one spot with a damp cloth instead of bathing the whole kitten.
Signs Your Kitten Needs a Bath
Watch for these clues that bath time is necessary:
- Visible dirt or debris in their fur
- Greasy or oily coat
- Strong unpleasant smell
- Fleas or flea dirt in their fur
- Got into something sticky or potentially toxic
- Diarrhea soiling their hindquarters
- Covered in outdoor mud or grime
If you just think your kitten “could use a bath” but none of these signs are present, skip it. Let their natural grooming do the work.
After the Bath: What to Expect
Your clean kitten will probably start grooming themselves immediately. This is normal. They’re redistributing their natural oils and getting their scent back.
Some kittens zoom around after baths – the famous “post-bath zoomies.” This is just them releasing nervous energy. It’s cute and completely harmless.
Watch for any skin reactions over the next few hours. Redness, excessive scratching, or bald patches could mean an allergic reaction to the shampoo. Call your vet if you notice these symptoms.
Your kitten’s fur should look shiny and feel soft once it’s completely dry. If their coat looks dull or feels rough, you might have missed some shampoo during rinsing.
Final Thoughts on Kitten Bath Time
Bathing a kitten doesn’t have to be a nightmare. With the right preparation, patience, and technique, you can keep your kitten clean and safe.
Remember these key points:
- Wait until at least 8 weeks old if possible
- Use only kitten-safe products
- Keep water lukewarm and shallow
- Work quickly but gently
- Rinse thoroughly
- Dry completely
- Don’t bathe more often than necessary
Every kitten reacts differently to water. Some take to it naturally while others need more convincing. Don’t compare your kitten to others or feel bad if baths are challenging at first.
The effort you put into making early baths positive pays off for years. A cat who tolerates bathing makes your life much easier when they inevitably get into something messy.
Stay calm, be patient, and celebrate small victories. Before you know it, you’ll be a pro at keeping your kitten squeaky clean.